Building a Generative UI app powered by Firebase AI is a significant technical achievement — but shipping a feature-rich application without a proper security strategy exposes you to real and costly risks. This includes unauthorized access to your backend resources, but also more subtle attack vectors: for example, bad actors sending an excessive number of requests directly to your LLM, burning through your token quota and driving up costs before you even notice.
We’ll walk through why application-level security goes beyond user authentication, and share a practical guide to implementing Firebase App Check to protect your app from unauthorized access and abuse — based on our experience securing a real Generative UI app, including the decisions we made and the gotchas we ran into along the way.
The Threat You’re Not Thinking About
When most developers think about security, they jump straight to authentication. “Users need to log in before they can access anything — we’re safe.” That’s a great start, but it’s not the whole picture.
Firebase credentials — API keys, project IDs, app IDs — are embedded in your web app and visible to anyone who inspects the source. A motivated attacker can extract them and use them to send requests directly to your backend — consuming your LLM token quota, triggering charges on paid Firebase services, or polluting your database with fake data.
This isn’t hypothetical. Teams have been caught off guard by Firebase bills in the thousands of dollars because their app was being scraped or abused by automated clients.
The core issue is that Firebase credentials are not secrets — they are identifiers. Knowing them is enough to make requests, which is why verifying the origin of those requests is essential.
What Is Firebase App Check?
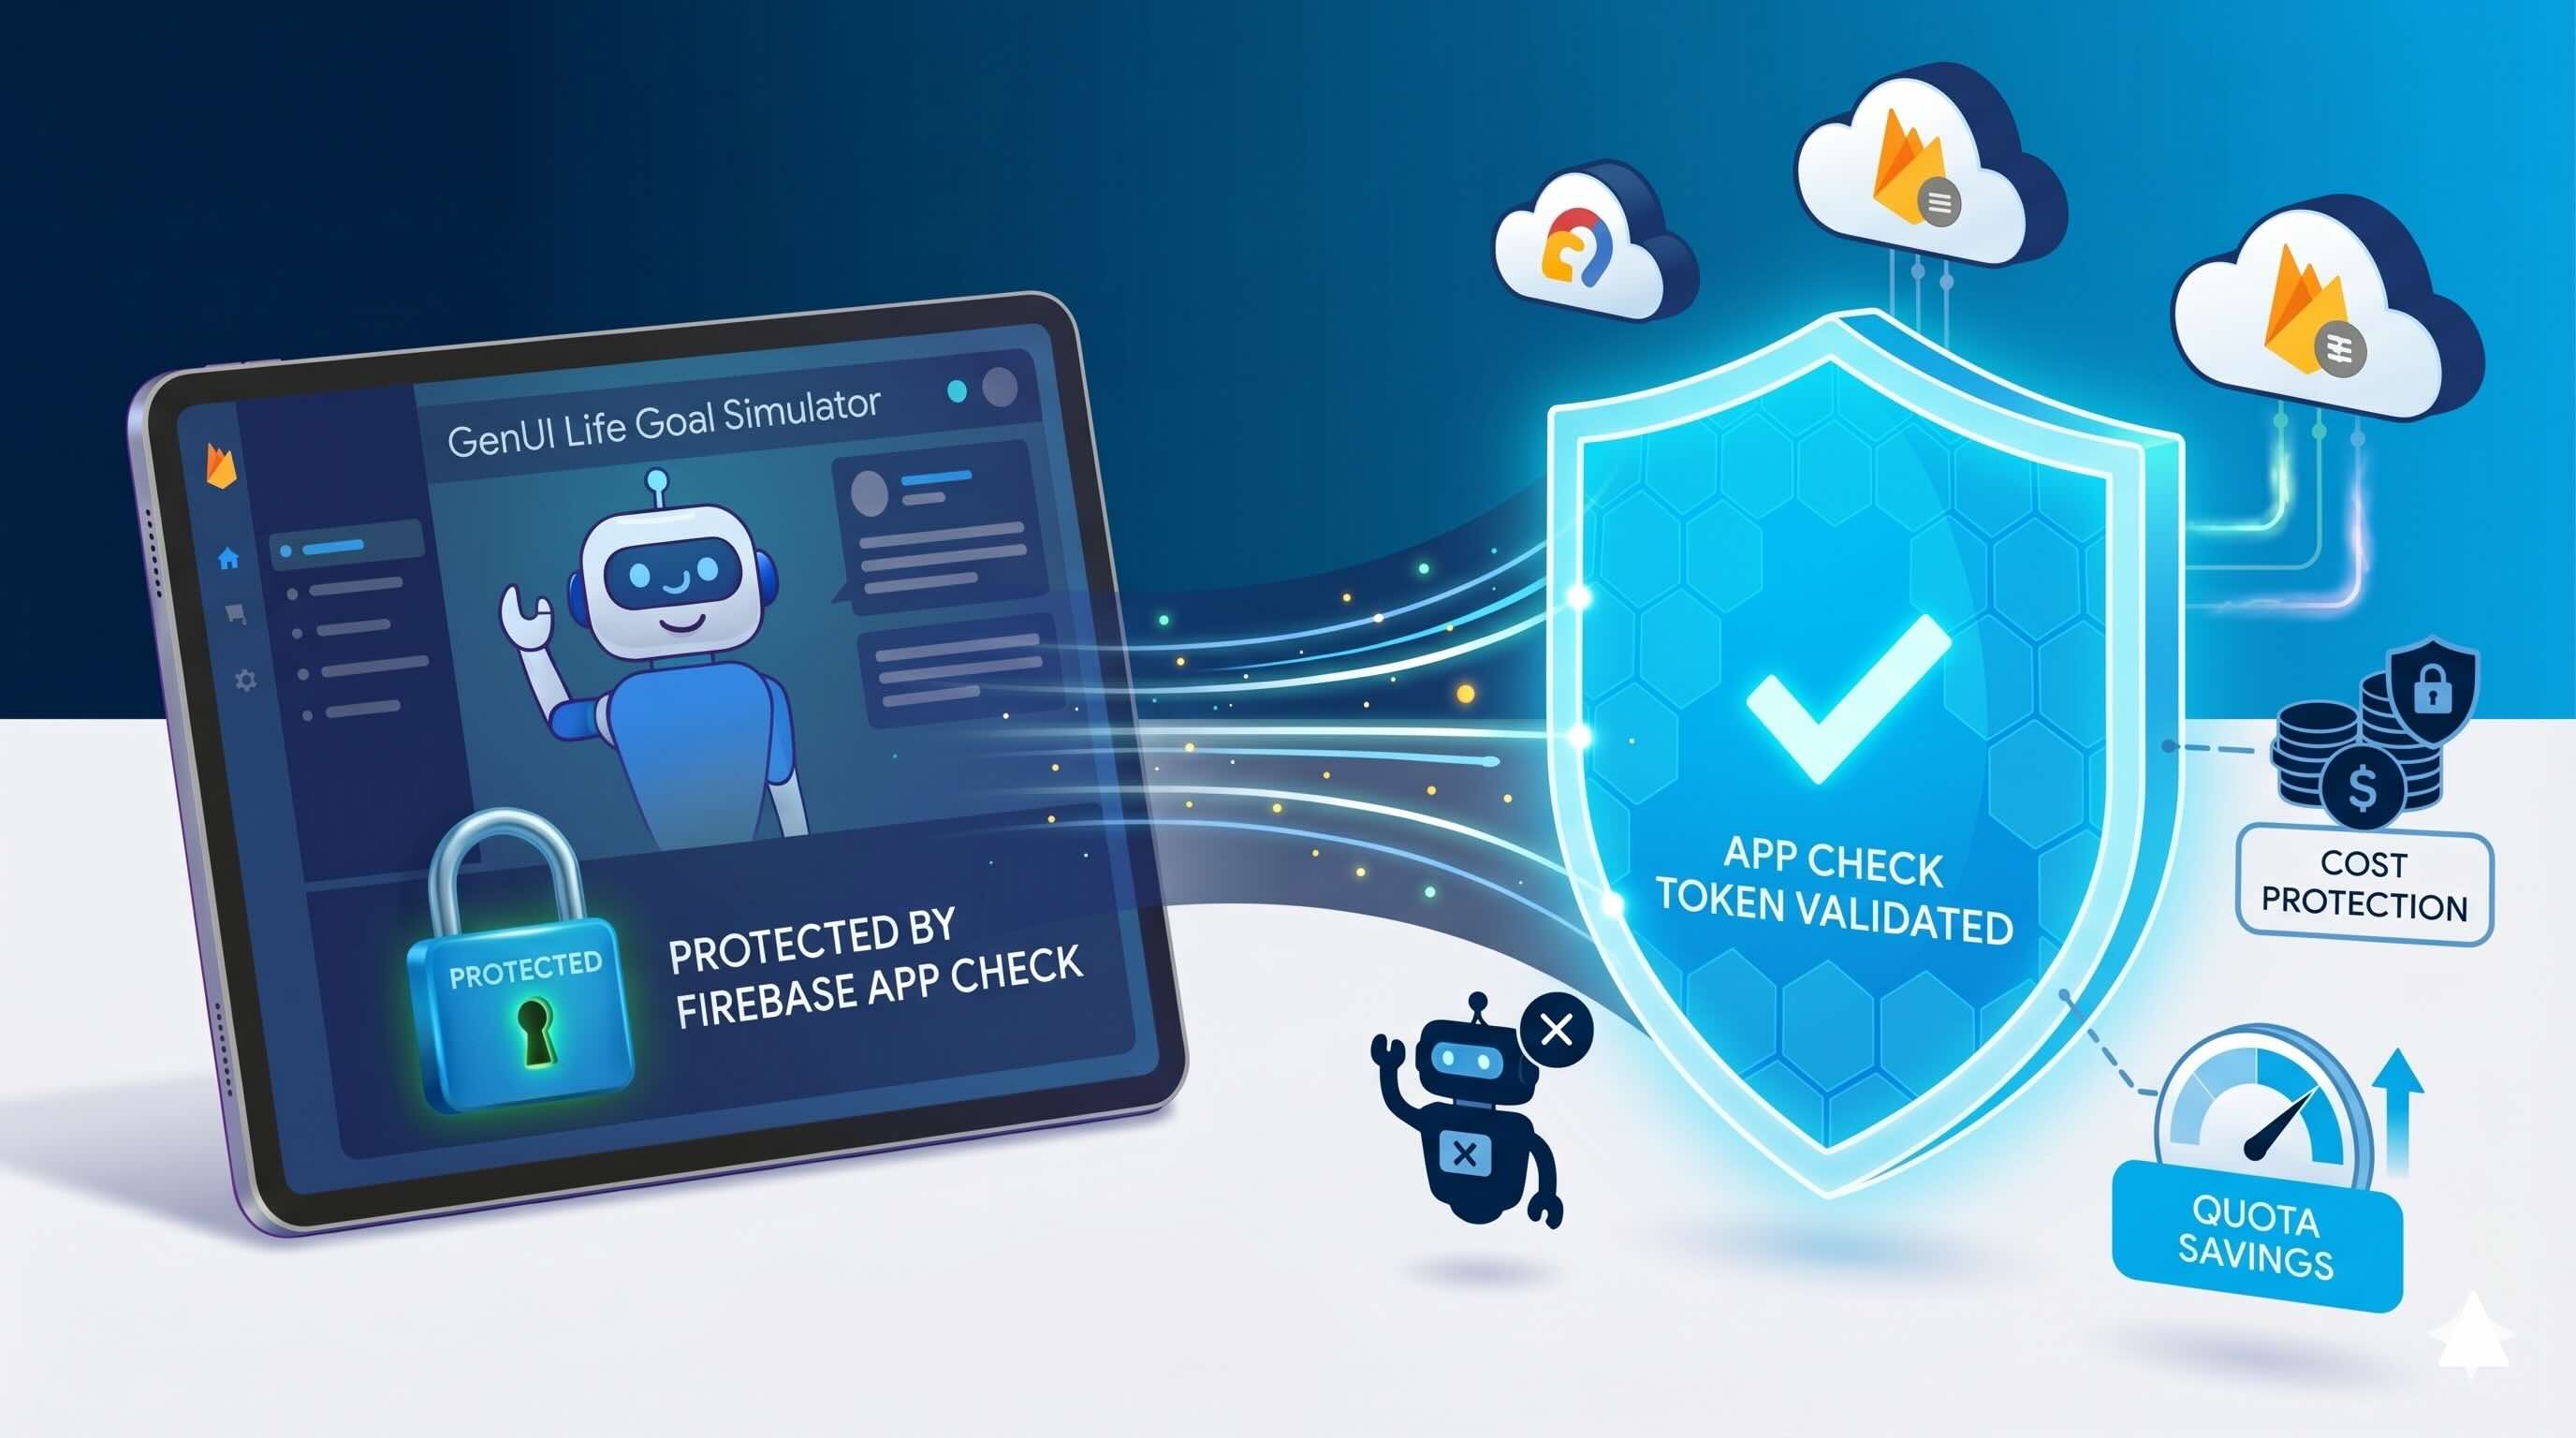
Firebase App Check addresses this by verifying where a request is coming from, not just who is making it. When a client runs your app, App Check uses a platform-level attestation provider to confirm the request originates from your legitimate app. That attestation is exchanged for an App Check token, which is automatically attached to every subsequent Firebase request. If the token is missing or invalid, the request is rejected before it ever reaches your backend — including your LLM.
For web apps, the attestation provider is reCAPTCHA v3, which analyzes browser signals to determine whether traffic is coming from a real user in a legitimate browser, or from a bot or automated script.
How We Secured Our GenUI Web App with App Check
App Check was added to our project as a formal requirement during active development — not as an afterthought. The scope was deliberately focused: secure the web app to prevent credential theft and unauthorized AI requests. Since each platform requires its own attestation provider, our reCAPTCHA configuration only applies to web — iOS, Android, and macOS will each need their own providers configured if added to the distribution in the future.
Step 1 — We Registered the Site in Google reCAPTCHA Admin
We went to https://www.google.com/recaptcha/admin/create and filled in the following:
- Label: anything descriptive, e.g. Finance App Web
- reCAPTCHA type: Score based (v3) — free and sufficient for most use cases
- Domains: all the domains where the app is hosted
For our Firebase Hosting project, this meant adding all the domains that appeared in the Firebase console:
| Domain | Purpose |
|---|---|
| your-app.web.app | Primary Firebase Hosting domain |
| your-app.firebaseapp.com | Alternate Firebase Hosting domain |
| Your custom domain (if any) | e.g. app.yourcompany.com |
We checked the Firebase console to confirm which domains were registered and added all of them. Keep this list up to date as your project grows: if you deploy to a new domain, such as a Firebase preview channel, and forget to add it here, reCAPTCHA will silently reject requests from it with no obvious error pointing to the cause.
We saved both the Site Key and the Secret Key generated at the end — we needed them in the next steps.
Step 2 — We Registered the Web App in Firebase Console
- We went to our Firebase project → Build → App Check → Apps tab
- Selected the Web app
- In the modal, chose reCAPTCHA v3 as the provider
- Pasted the Secret Key from Step 1
- Clicked Save
Step 3 — We Added the firebase_app_check Package
In pubspec.yaml, we added the dependency:
dependencies:
  firebase_app_check: ^0.3.2
Note: check pub.dev for the latest version.
Then ran:
flutter pub getStep 4 — We Initialized App Check in main.dart
In our project, Firebase is initialized in a main.dart file. App Check must be activated immediately after Firebase.initializeApp() and before any other Firebase service is used:
// Add this import
import 'package:firebase_app_check/firebase_app_check.dart';

Future<void> main({...}) async {
  final binding = WidgetsFlutterBinding.ensureInitialized();

  await Firebase.initializeApp(
    options: DefaultFirebaseOptions.currentPlatform,
  );

  // Activate App Check right after initializeApp
  await FirebaseAppCheck.instance.activate(
    webProvider: ReCaptchaV3Provider(
      const String.fromEnvironment('RECAPTCHA_SITE_KEY')
    ),
  );

  // ...
}
Never hardcode the Site Key directly in your source code. We stored it in a .env file, added it to .gitignore to keep it out of version control, and passed it at build time via --dart-define-from-file=.env.
Step 5 — We Tested Using the Debug Provider
Before enabling enforcement, we verified that everything was working. Every team member needed to:
- Run
flutter run -d chrome— Firebase App Check prints a debug token to the console:
App Check debug token: XXXXXXXX-XXXX-XXXX-XXXX-XXXXXXXXXXXX-
Register their individual token in Firebase Console → App Check → Apps → Web app → Debug tokens → Add debug token. This allows the local development environment to pass App Check validation without a real reCAPTCHA attestation.
-
Store their own debug token in their
.envfile, and at build time pass it via--dart-define-from-file=.env. -
Set the stored debug token for web, iOS, and Android in our main function from the environment variable. For example,
providerAndroid:
const debugToken = String.fromEnvironment('APP_CHECK_DEBUG_TOKEN');

await FirebaseAppCheck.instance.activate(
  providerAndroid: debugToken.isNotEmpty
    ? const AndroidDebugProvider(debugToken: debugToken)
    : const AndroidPlayIntegrityProvider(),
);
Keep debug tokens private — anyone who has one can bypass App Check entirely.
For a full working example, see the firebase_app_check example on pub.dev.
Step 6 — We Enabled Enforcement in Firebase Console
Once we confirmed that App Check was working correctly, we enabled enforcement:
- Firebase Console → App Check → APIs
- Found Firebase AI and any other Firebase services in use
- Clicked Enforce
Once enabled, Firebase will begin rejecting requests that do not carry a valid App Check token — including unauthorized scripts attempting to use our credentials to make AI requests. Note that enforcement may take a few minutes to propagate.
A Note on What App Check Doesn’t Do
With enforcement enabled, your app is significantly better protected — but it is worth being clear about what App Check covers and what it does not.
-
It does not prevent all abuse. A sophisticated attacker with a real browser and a real copy of your app can still make requests. App Check eliminates automated, script-based abuse — not every conceivable attack vector.
-
It does not protect against misuse by legitimate users. If an authenticated user abuses your app from a real browser, App Check will not stop them. Rate limiting and usage quotas are complementary tools for that scenario.
Conclusion
For AI-powered applications, App Check is one of the most important controls you can put in place. Without it, our Firebase credentials were all an attacker needed to start making LLM requests on our behalf — burning through our token quota before we even noticed. With Firebase App Check and reCAPTCHA v3 in place, only traffic originating from our legitimate web app can reach our backend.
For the full Firebase App Check documentation, visit firebase.google.com/docs/app-check.