On this page
- Understanding Rive’s State Machine Model
- Core Concepts: State Machines, Transitions, and Inputs
- Basic Usage: Playing a Simple Animation
- State Machines and Interactivity
- Advanced Patterns
- Best Practices
- How Rive Powers AI-Driven Interfaces: The Very Good Life Simulator
- Going Deeper: Extending the GenUI-Rive Integration
- The Separation of Concerns
Understanding Rive’s State Machine Model
When we built the Very Good Life Simulator for Google Cloud Next 2026, we faced a design challenge: Firebase AI and GenUI were generating the UI dynamically, but without a way to signal progress back to the user, the interface felt frozen during LLM inference. We chose Rive to handle that problem—its state machine model let us decouple animation logic from widget rendering, so a designer could iterate on loading states without touching our Flutter code.
Rive is an interactive animation tool that allows designers and developers to build animations with built-in logic. Rive uses a state machine model, making animations reactive and data-driven. Rive animations are exported as lightweight .riv files and run natively on Flutter, iOS, Android, web, and other platforms. The Rive Flutter package integrates seamlessly with the Flutter widget tree, treating animations as first-class UI components.
Use Rive for interactive or state-driven animations designed by a dedicated designer. For simple, fire-and-forget animations, Lottie is still a solid option.
Core Concepts: State Machines, Transitions, and Inputs
The real power of Rive comes from its state machine design. A state machine consists of states, transitions, and inputs. Flutter interacts with it by reading and writing input values at runtime. Understanding this model is essential before diving into implementation.
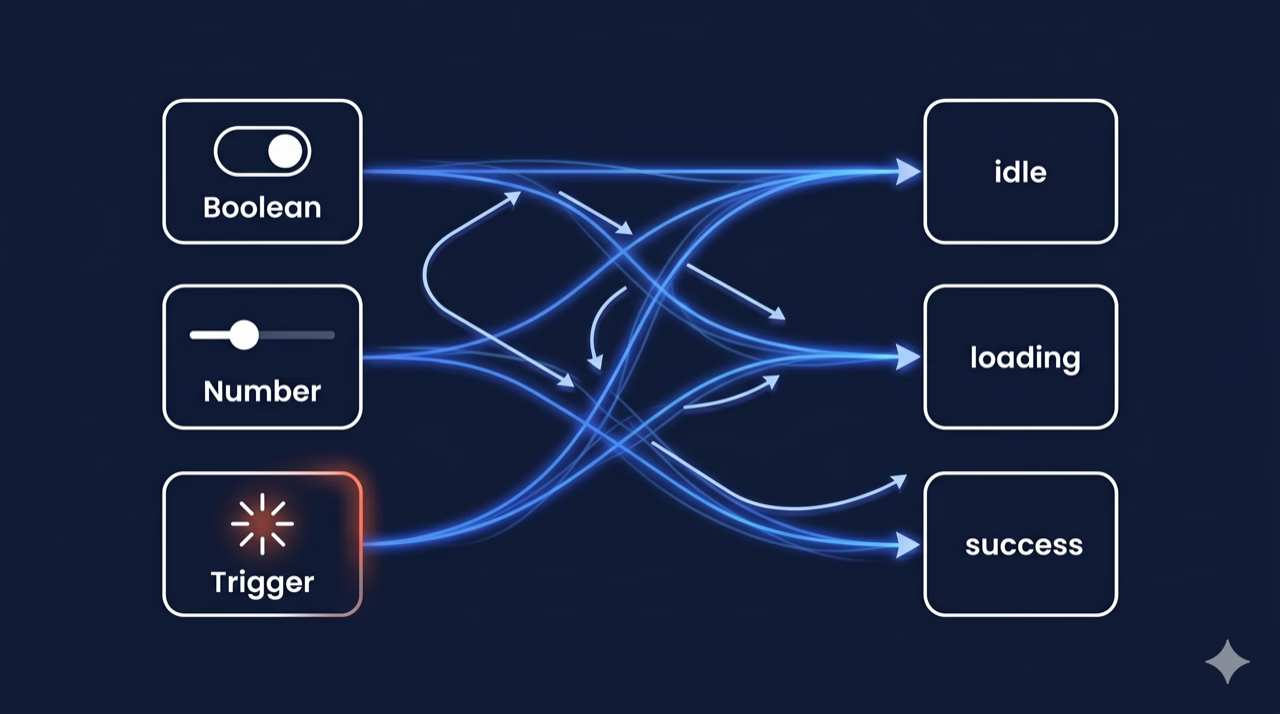
There are different types of state machine inputs:
- Boolean: Toggle between two states (e.g.,
isHovered,isActive) - Number: Drive animations with numeric values (e.g.,
progress 0.0-1.0,speed) - Trigger: Fire a one-shot event (e.g.,
tap,explode,reset)
This separation of data (inputs) from presentation (animation) is what makes Rive powerful in AI-driven contexts. The LLM controls the inputs; the designer controls the visual response.
Basic Usage: Playing a Simple Animation
The simplest way to embed a Rive animation is using the RiveAnimation widget. It handles loading, asset management, and rendering automatically.
First, add the rive package to your pubspec.yaml file:
dependencies:
  rive: ^0.14.4  # Always use the latest stable version
Then, use the RiveAnimation widget to load and display an animation:
import 'package:flutter/material.dart';
import 'package:rive/rive.dart';

class SimpleRiveWidget extends StatelessWidget {
  const SimpleRiveWidget({super.key});

  @override
  Widget build(BuildContext context) {
    return Scaffold(
      body: Center(
        child: RiveAnimation.asset(
          'assets/animations/my_animation.riv',
          animations: const ['idle'], // Animation clip name
          fit: BoxFit.contain,
        ),
      ),
    );
  }
}
The RiveAnimation.asset() constructor accepts several key parameters:
| Parameter | Type | Description |
|---|---|---|
| animations | List<String>? | Named animation clips to play. If empty, plays the default |
| stateMachines | List<String>? | State machine names to activate. Used for interactive animations |
| alignment | Alignment | How the animation aligns inside its bounds |
| onInit | OnInitCallback? | Callback fired when the Rive artboard is initialized |
| controllers | List<RiveAnimationController>? | Manual controllers for programmatic control |
| artboard | String? | Name of the artboard to use (if the .riv has multiple) |
State Machines and Interactivity
Beyond static playback, state-driven architecture unlocks true interactivity by letting your Flutter code read and write animation inputs at runtime.
Use onInit to capture StateMachineController references, then manipulate inputs from your Flutter widget. Always call _controller?.dispose() in the widget’s dispose() method; the StateMachineController holds native resources that must be explicitly released, or you risk memory leaks under repeated navigation.
Advanced Patterns
Use RiveAnimation.network() to load animations from a remote URL. When you need to pre-load animations or share assets across widgets, use RiveFile directly. Rive animations can also be driven by scroll position, sensor data, or any numeric value.
Rive 0.12+ supports events; animations can fire named events back to Flutter. This is useful for triggering haptics, sound, or navigation at specific interaction moments.
Best Practices
Performance
- Pre-load
.rivfiles ininitStateor aFutureBuilder; never load them insidebuild() - Reuse
RiveFileinstances when displaying the same animation multiple times - Use
RepaintBoundaryaround Rive widgets to isolate repaints from the rest of the tree - Prefer smaller, focused
.rivfiles over large monolithic ones
Architecture
- Keep
StateMachineControllerinStatefulWidgetstate, not in a BuildContext-dependent callback - Expose animation inputs through a
ChangeNotifierorBlocfor testability - Use const constructors where possible to prevent unnecessary widget rebuilds
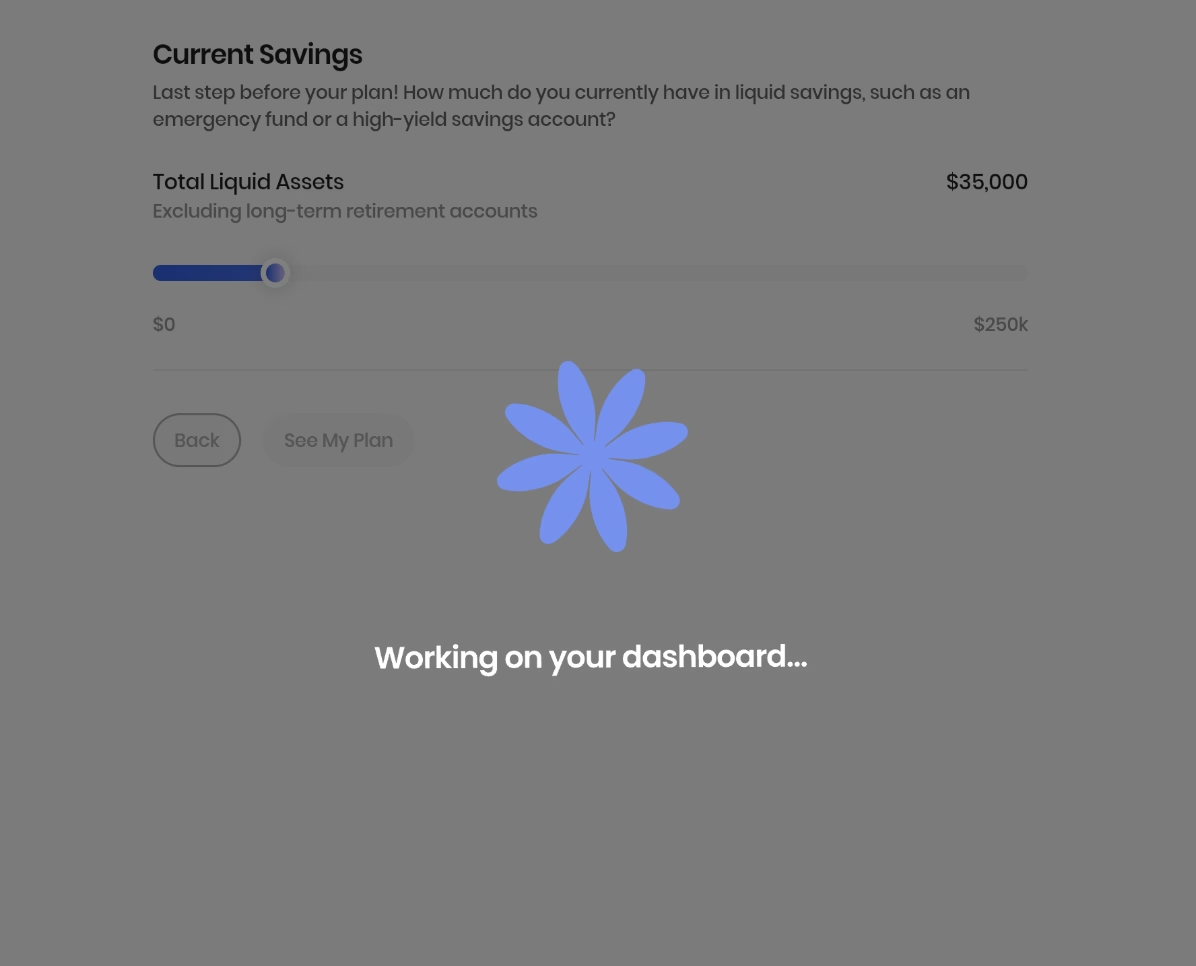
How Rive Powers AI-Driven Interfaces: The Very Good Life Simulator
To make this concrete, we partnered with Google to build the Very Good Life Simulator, a financial planning app that combines Firebase AI, Google’s GenUI framework for AI-driven Flutter widget rendering, and Rive animations. The interplay between these three systems is where the state machine patterns above come alive.
The app uses rive: ^0.14.4, which uses the new Rive Flutter API. The new API separates asset loading (FileLoader) from rendering (RiveWidget) and exposes lifecycle states as sealed classes (RiveLoaded, RiveLoading, RiveFailed). RiveNative.init() is called once at app startup (bootstrap.dart), before Firebase initializes.
Two .riv files live in assets/animations/:
| Asset | Widget | Purpose |
|---|---|---|
thinking.riv | ThinkingAnimation | Inline spinner while the LLM generates a response |
loading.riv | LoadingOverlay | Full-screen overlay for major page transitions |
The GenUI Contract: Driving Rive with JSON
The bridge between AI-generated UI and Rive is a single JSON boolean declared in the AppButton catalog item’s schema:
'showLoadingOverlay': S.boolean(
  description:
    'Whether to show the full-screen loading animation when this '
    'button is pressed. Use for major transitions like navigating to the summary dashboard.',
),
The prompt instructs the model to set showLoadingOverlay: true on the button that triggers the summary/dashboard transition. When the user taps that button, the key insight is simplicity: the contract is a single boolean. When the LLM designates a button as a major transition, the event flow is straightforward. The button press fires SimulatorLoadingOverlayRequested into the bloc, which flips showLoadingOverlay to true. SimulatorView layers a Positioned.fill(child: LoadingOverlay()) on top. When the LLM response arrives and navigation completes, the bloc resets the state to false, and independently, the .riv event fires GeneralEvent('complete'), aligning the animation lifecycle with the navigation. This dual-sync (bloc state and animation event) keeps the system loosely coupled: the Rive file can change its trigger name or timing without touching Flutter code.
For buttons without showLoadingOverlay, an inline ThinkingAnimation replaces the button while isLoading is true. The button is kept in the tree but hidden to prevent layout shifts.
Going Deeper: Extending the GenUI-Rive Integration
Currently, the GenUI-Rive integration supports binary overlay logic. Below are four patterns to extend this approach. These are optional extensions that show the full reach of the framework.
State Machine Inputs from JSON
The most direct extension is exposing Rive state machine inputs as schema properties. The new Rive API exposes state machine inputs via controller.stateMachine.inputs. You can set boolean, number, or trigger inputs from GenUI properties:
// After RiveLoaded:
final inputs = state.controller.stateMachine.inputs;
final progress = inputs.whereType<SMINumber>().firstWhere((i) => i.name == 'progress');
progress.value = json['progress'] as double;

final isSuccess = inputs.whereType<SMIBool>().firstWhere((i) => i.name == 'isSuccess');
isSuccess.value = json['animationVariant'] == 'success';
In the catalog item schema, this becomes:
'animationVariant': S.string(
  enumValues: ['loading', 'success', 'error'],
  description: 'Visual state to drive the animation into.',
),
This lets the LLM pick the semantic state; the Rive file handles all the motion design.
Progress-Driven Animations
For a goal completion meter, expose a number input (0–100) and bind it to a GenUI MetricCard or summary value. The Rive designer builds the motion; GenUI just pipes the number:
progressInput.value = (json['completionPercent'] as num).toDouble();One-Shot Triggers
Rive events can drive multi-step flows by firing named events back to Flutter. Instead of generic 'complete' events, the .riv file can fire named GeneralEvents like 'onCtaReady' or 'onErrorShow'. The widget listens and maps each to a UserActionEvent dispatched back into GenUI:
void _onRiveEvent(Event event) {
  if (event case GeneralEvent(name: final name)) {
    ctx.dispatchEvent(UserActionEvent(name: 'riveEvent:$name', ...));
  }
}
This turns the animation into an active participant in the conversation. For example, the LLM can wait for 'riveEvent:introComplete' before showing the first question.
Scroll-Driven Scrubbing
For motion-following interactions, set the state machine’s time or a number input to ScrollController.offset. This works well for hero sections or onboarding flows where motion should follow the user’s gesture instead of playing automatically.
The Separation of Concerns
Each of these patterns follows the same underlying principle: let Rive own the motion, let GenUI own the data. The catalog item schema acts as the contract, the LLM makes semantic decisions (which state?, what progress value?, when to fire a trigger?), while the .riv file handles the visual design. This separation of concerns means designers can iterate on motion without touching Flutter code, and the AI can drive animations without needing to understand their internal implementation.
The payoff is responsive, data-driven animation without rebuilding the entire rendering pipeline. Because Rive owns the motion and GenUI owns the data, designers and AI systems can evolve independently. You get interfaces that don’t just display information—they respond to it.