We joined a native-to-Flutter migration with a mature design system. Dozens of components in Figma, each with specific spacing tokens, color mappings, typography scales, and interaction states. Translating those into production-ready Dart widgets is repetitive work. Spacing values, color tokens, file scaffolding, golden tests, Widgetbook use cases, barrel updates. Multiply that across forty components and you have weeks of low-judgment, high-detail work.
That’s the exact profile of work an AI agent should handle. The engineer reviews the output instead of writing boilerplate.
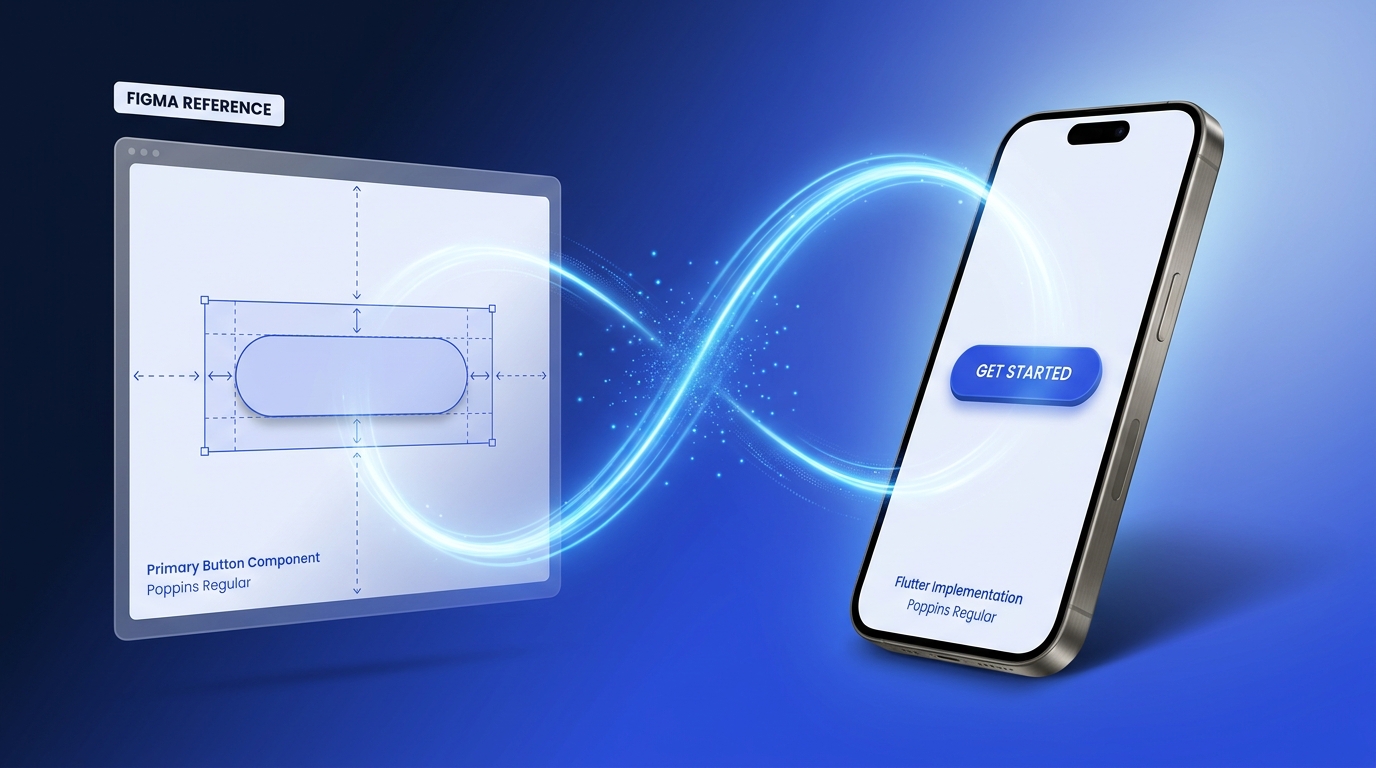
So I built a Claude Code skill for it. This post walks through the Figma to Flutter workflow we developed, why generic AI prompting falls short for design system automation, and how the skill closes the gap between an AI-generated widget and a mergeable PR.
Why Generic AI Prompting Falls Short
The naive approach: paste a Figma screenshot into an AI chat, ask for a Flutter widget. The output looks close but isn’t production-ready. Hardcoded color values instead of ColorScheme. Invented spacing constants instead of the project’s AppSpacing. No awareness of the existing component library. No tests.
This is also where plugin-based Figma to Flutter tools (Visual Copilot, FlutterFlow, and similar) hit their ceiling. They produce literal code without theme awareness, test coverage, or documentation. A structured skill operates differently. It treats Flutter design system automation as a workflow, not a one-shot generation step.
The gap between AI-generated widget and mergeable PR is where the real work lives. Design token integration, theme compliance, reuse, visual validation, documentation. A structured skill can close it.
The Core Idea: Deterministic Steps, AI Judgment, Human Gates
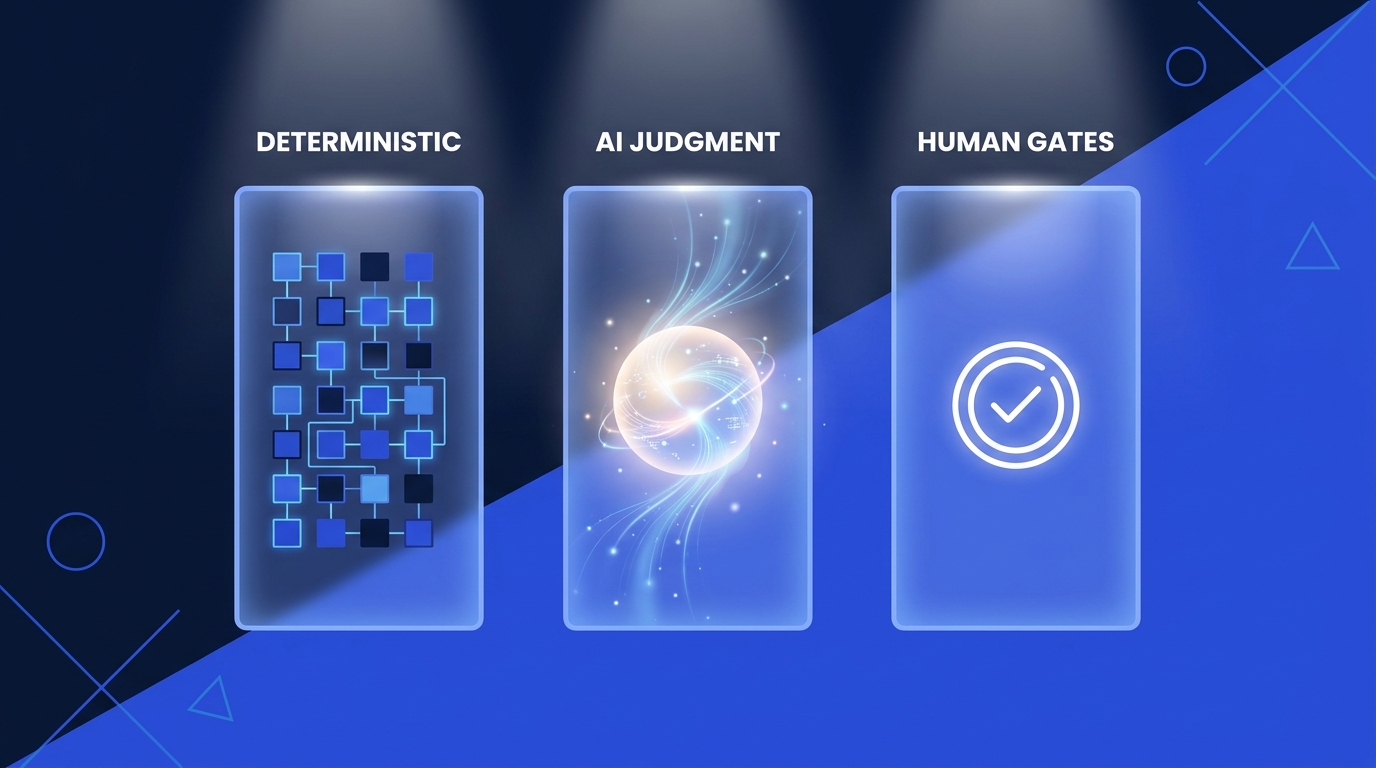
The skill separates what should be deterministic from what requires judgment. This is the architectural pattern behind the workflow, and it’s a useful lens for Claude Code best practices generally.
Deterministic: fetching the Figma design context via the MCP server, extracting node IDs from URLs, scaffolding file structures, generating golden test boilerplate, updating barrel files. These have a “right answer” defined by project conventions.
AI judgment: deciding which Flutter built-in widget to use (FilledButton vs. a custom component), composing the widget tree from Figma’s layout properties, mapping design tokens to the project’s theme system, choosing when to reuse versus build new.
Human gates: the engineer reviews every generated widget before it merges. The skill produces the implementation, golden tests, and Widgetbook use cases. The engineer then decides whether the output meets the bar.
This isn’t autonomous code generation. It’s structured AI assistance with explicit review points.
The Figma to Flutter Workflow
The skill executes six phases. Here’s how.
Phase 1: Fetch the Design Context
The engineer provides a Figma URL. The skill extracts the file key and node ID, then calls the Figma MCP server twice. First for get_design_context, which returns structured layout data. Spacing, typography, colors, component hierarchy. Second for get_screenshot, the visual reference that becomes the benchmark for the rest of the process.
For complex components where the context response is too large, the skill falls back to get_metadata for a high-level node map, then fetches individual child nodes separately. For broader context on MCP Flutter integration, see our guide to the 7 MCP servers every Dart and Flutter developer should know.
Phase 2: Map Design Tokens to the Project’s Theme
This is the highest-leverage step. Generic AI prompts skip it entirely. Before generating any widgets, the skill maps Figma’s design tokens to the project’s existing theme system. Colors map to ColorScheme properties. Custom colors that fall outside the standard palette go into ThemeExtension. Typography maps to TextTheme. Spacing maps to AppSpacing constants.
The practical effect is that every generated widget supports light mode, dark mode, and future theme changes out of the box. For deeper context on this approach, see our post on mastering scalable theming for custom widgets and the VGV Engineering theming reference.
Instead of:
// Generic AI output. Hardcoded values.
Container(
  padding: EdgeInsets.all(16),
  color: Color(0xFF1B5E20),
  child: Text('Hello', style: TextStyle(fontSize: 14)),
)
The skill produces:
// Skill output. Theme-integrated.
Padding(
  padding: const EdgeInsets.all(AppSpacing.lg),
  child: ColoredBox(
    color: Theme.of(context).colorScheme.primary,
    child: Text('Hello', style: Theme.of(context).textTheme.bodyLarge),
  ),
)
Every value traces back to the theme. No orphaned magic numbers.
For teams handling Figma styles export at scale, the Very Good Flutter Styles plugin takes a complementary approach to the same problem.
Phase 3: Translate to Idiomatic Flutter Widgets
The skill translates Figma’s layout model into Flutter’s widget tree. Auto Layout becomes Row or Column, Fill Container becomes Expanded, Hug Contents becomes MainAxisSize.min.
Three rules keep the output production-quality.
Prefer Flutter’s built-in widgets. If the Figma design shows a button, the skill checks whether a styled FilledButton or OutlinedButton can match the design through ThemeData before creating a custom widget. Same for Divider, Chip, Card, ListTile. Recreating built-in widgets from Container and InkWell is a common AI mistake the skill explicitly avoids.
Reuse existing components. Before creating anything new, the skill scans the project’s UI package for matching components. If an AppButton already exists, it extends it with new variants rather than duplicating. This is critical on a migration project where widgets accumulate over time.
Implement only what Figma defines. If a component has one size and one state in Figma, the skill implements one size and one state. No invented variants, no speculative API surface. This keeps the output focused and reviewable.
The skill extracts parts of the widget tree into private StatelessWidget classes rather than _buildX() helper methods. This is a VGV convention that enables const constructors, independent rebuilds, and better testability.
Phase 4: The Visual Comparison Loop
Instead of generating golden tests and hoping for the best, the skill runs an iterative visual comparison loop. It renders the widget, reads its own output with vision capabilities, compares it against the Figma screenshot, and adjusts until the two match. This closed-loop validation is the most distinctive part of the workflow.
The mechanics. The skill generates a throwaway Alchemist test (Alchemist is VGV’s golden-testing library) with autoUpdateGoldenFiles = true, runs it to produce a PNG, then reads that PNG and evaluates it against the Figma reference from Phase 1. It checks layout, typography, colors, corner radii, shadows, and asset rendering. Any discrepancies trigger iteration. The loop continues until parity is achieved.
Once visual parity is confirmed, the throwaway test file and its golden artifacts are deleted. They served their purpose: giving the AI eyes to validate its own work.
For a complementary take that pairs the Figma MCP with Maestro for runtime verification, see our post on building pixel-perfect Flutter UIs with Figma, Maestro, and Dart MCPs.
Phase 5: Golden Tests and Widgetbook Use Cases
The visual comparison loop handles immediate validation. For long-term visual regression protection, the skill offers two options. Neither is mandatory. This reflects Flutter testing best practices we’ve refined across migration projects.
Golden tests are optional. The skill asks the engineer before generating them. For core buttons and typography scales, permanent Alchemist golden tests catch regressions in CI automatically. For components still in active iteration, they create noise. The engineer decides.
goldenTest(
  'renders correctly',
  fileName: 'app_button',
  tags: ['golden'],
  builder: () => GoldenTestGroup(
    children: [
      GoldenTestScenario(
        name: 'default',
        child: Theme(
          data: AppTheme.light,
          child: const AppButton(
            label: 'Click me',
            onPressed: _noop, // _noop is an empty callback defined in the test file.
          ),
        ),
      ),
    ],
  ),
);
Widgetbook use cases are generated whenever the project uses Widgetbook. Each use case links back to the original Figma design URL and includes interactive knobs, so designers and developers can explore the component without navigating away.
@UseCase(
  designLink: 'https://figma.com/design/...',
  name: 'Playground',
  type: AppButton,
)
Widget appButtonPlayground(BuildContext context) {
  final label = context.knobs.string(
    label: 'Label',
    initialValue: 'Click me',
  );
  final isEnabled = context.knobs.boolean(
    label: 'Enabled',
    initialValue: true,
  );

  return Theme(
    data: AppTheme.light,
    child: AppButton(
      label: label,
      onPressed: isEnabled ? () {} : null,
    ),
  );
}
The visual comparison loop confirms parity at implementation time, golden tests guard against regressions in CI, and Widgetbook gives designers a live environment to confirm the implementation matches their intent.
Phase 6: Self-Validate and Report
The skill runs flutter test and flutter analyze, then compiles a report. What was implemented, what Figma states were covered, any unresolved items.
Unresolved items like missing assets, unmatched fonts, or slight shadow mismatches get // TODO: comments in the code and a summary in the report. The skill surfaces problems explicitly so the reviewing engineer knows what needs attention.
What We Learned
Building and iterating on this skill across a real migration project surfaced several practical lessons.
AI vision closes the loop, mostly. The skill reads its own rendered output and compares it against the Figma screenshot using vision capabilities. This eliminates manual eyeballing. Vision-based comparison has limits. It catches layout mismatches and color discrepancies reliably, but subtle issues like 1px borders or slight shadow spread variations can slip through. The next frontier: pairing AI vision with programmatic pixel-diff scoring for true quantitative validation. That’s the single biggest remaining gap in the workflow.
Reuse compounds over time. Early in the migration, most components are new. As the UI kit grows, the skill spends less time generating widgets and more time composing existing ones. A card component that would be built from scratch in week one gets assembled from AppAvatar, AppBadge, and AppButton in week six. The skill’s instruction to check existing components before creating new ones is what makes this compounding work. We saw a similar dynamic in how Hespress aligned Figma designs directly with Flutter code on their team.
Theme integration up-front pays off later. Mapping every value to ColorScheme, TextTheme, and AppSpacing in Phase 2 means light mode, dark mode, and future rebrands work without rework. Skipping this step is how AI-generated widgets become orphaned code.
Where This Fits in VGV’s Flutter AI Engineering Stack
This Figma to Flutter skill is one piece of a stack we’ve been building across VGV projects. Each piece solves a different problem at a different scale.
The VGV AI Flutter Plugin (open source) encodes our production conventions directly at the code level. It’s the foundation: consistent architecture, consistent patterns, consistent quality, enforced by the tooling itself. VGV Wingspan (open source) structures the workflow around those conventions. Where the plugin handles the what, Wingspan handles the how. Orchestrating multi-step engineering tasks with the right sequence, the right context, and the right validation at each stage. VGV Arcana scales the conventions and workflow across entire organizations. Native-to-Flutter migrations, comprehensive codebase assessments, Figma to code at scale. The kind of challenges where you need conventions, workflow, and the ability to apply them across dozens of projects and teams simultaneously. The Figma to Flutter skill in this post is part of Arcana.
The pattern generalizes. Any repeatable engineering workflow with clear structure and well-defined quality criteria works as a skill. The key design choice: where to draw the line between what the AI handles and where the human reviews. For design system implementation, the line is clear. The AI maps tokens, generates widgets, writes tests, and scaffolds use cases. The engineer validates visual fidelity, confirms the component fits the broader system, and decides when it merges.
The engineer’s time shifts from transcribing spacing values to reviewing and refining output. That’s where engineering judgment actually matters.
I plan to cover the other Arcana skills in upcoming posts. The same pattern of deterministic steps, AI judgment, and explicit human review applies across the rest of the migration workflow.