Ever since running my first Flutter app on an Android device and an iPhone, I can’t help but wonder whenever I see a device with a display: Can this run Flutter?
It is all speculation until one goes deep into a device’s specifications to see whether the hardware can handle it. Of all the devices out there, those powered by Android-based operating systems will most likely run a Flutter application without too much hassle. That is precisely the case for Wear OS.
After spending some time on experimentation, and finally shipping a real Wear OS game, I learned how to make Flutter run on anyone’s wrist, which raised a few questions that I had to answer. Questions such as:
- How should a Wear OS application work?
- What about battery Life?
- Do screen sizes and screen shapes matter?
- How should my UI behave?
- And finally, how to ship the app?
That is what we are talking about today. Let us begin!
Understanding Wear OS
Just because an app can be executed on different types of screens doesn’t mean that the application should look the same on all of them.
This is mainly because, unlike smartphones, physical constraints from a device such as a wearable, can change the app’s usability. For example, a watch may want to reflect a certain theme during the day versus during the night. Porting a mobile phone UI directly to a smartwatch without changes will certainly result in a bad user experience.
From the usability front, one should consider the following when building apps for smartwatches:
☝️One-finger UI:
Since a smartwatch is expected to be strapped to the user’s arm most of the time, assume that all the input that a screen will receive will be from a single finger. As a result, Wear OS applications should avoid multi-touch gestures unless completely necessary.
🤏 Displays can be tiny:
As expected, smartwatches have to be fashionable. As a result, screens may vary, but always under a few inches. The Pixel watch is 1.24 inches, while the Galaxy Watch 5 pro is 1.4 inches. This means that every pixel on the screen is even more precious than on smartphones. Some tips when building UI for tiny screens:
- Try to make each view self-containing. Use scrollable views only when necessary and expected
- Be extra careful with the clickable areas of buttons
🏠 Displays can be weirdly shaped:
 Photo by Triyansh Gill on Unsplash
The world of Android smartwatches is full of bespoke screens. In the case of Wear OS, one has to be prepared for either square or circular screens.
It is essential to notice that devices like the Pixel Watch have seamless dark bezels on OLED screens. This makes dark backgrounds or vignettes good design options.
⚙️Inputs may vary:
Wear OS watches have three main types of hardware input:
- Touch screen
- Physical buttons
- Rotary input
Apart from the touch screen, these inputs are not uniform among the different models of watches and can even be absent in some cases.
The rotary input is used from interactions such as scroll. On watches like the Samsung Galaxy Watch 4 Classic, it takes the form of a rotating bezel. On Watches like the Pixel Watch, it takes the form of a side crown that works as a sole hardware button.
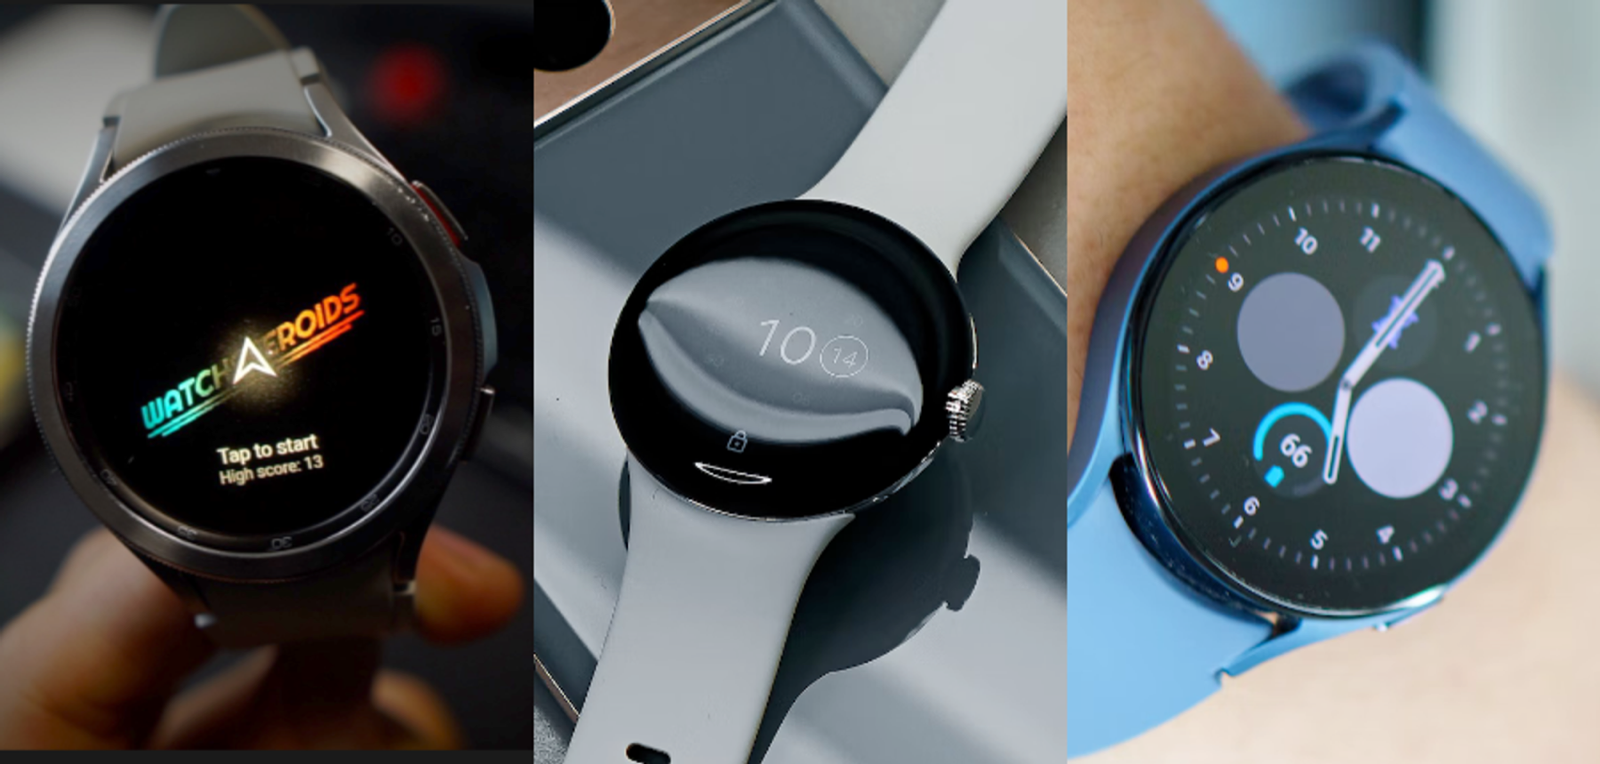 Example of different watches with different hardware inputs. The one to the left has hardware buttons and a rotating bezel; the one in the middle has a rotating crown and no buttons; the one on the right has no physical rotary input but two physical buttons. Photos by Me, Triyansh Gill and Shawn Rain on Unsplash.
🔋Spare the battery
Wear OS devices are quite powerful for their size, but with great power comes severe battery consumption. Nobody likes seeing their watch dying quickly because a specific application drains all of its energy. Be mindful of how much CPU power your app requires. Go easy on animations and take advantage of dark UIs on OLED-based devices.
⌚️Plan if your app will be standalone
Wear OS apps can run on smartwatch devices without needing a companion smartphone app. Those are called standalone apps, and this is the type of app we will be building in this tutorial. Another consideration is whether you will support Wear OS 2 and earlier devices; this documentation helps you plan if your Wear OS app will or won’t be a standalone app.
Keep on reading
The best place to know about Wear OS is its documentation; here are some useful links on the aspect of usability and anatomy of Wear OS applications:
The state of Wear OS support on Flutter
There are a few things to expect when building a Wear OS app. Even though people have written and deployed Wear OS apps made with Flutter, when targeting smartwatches:
You should expect the following:
- Most (if not all) efforts on this front are community-led: plugins, examples, and articles — like this very one.
- Most features that are available for Android should work on Wear OS, including flavors and most plugins.
- Native APIs are reachable via method calls or FFIs, like Health Services.
You should not expect the following:
- First-party efforts such as official smartwatch support from Flutter, is listed as a non-goal.
- Wear OS-specific features to be baked into the framework, for example, Platform.isWear. From the Framework point of view, a Wear OS app is an Android app.
- An app to have different runners for Wear OS and Android. Wear OS code will go under the android directory; there is no support for something in a wearos directory with a specific platform code.
💡 What about building apps for the Apple Watch? More on that at the end of this article.
Building a Wear OS app with Flutter
Now that we know what we should consider when building any app attached to people’s wrists, let’s learn how to use Flutter to do it.
💡 Before starting, you may want to prepare a device to debug your application. You can read about how to create a watch emulator or how to debug it on a physical device.
It is important to notice that any Wear OS app is essentially just an Android app. So, to run Flutter on a Wear OS device (or emulator), we need to adjust some files under the android directory. Besides that, on the Flutter side of things, we must adapt the UI for the small screens and get some useful information from the hardware. Now that the objectives are clear, let us build something!
In this tutorial, we will build a counter app (just like very_good_core) that:
- Has a basic dark UI (to save some energy on OLED devices)
- Adapts its colors for when the watch goes on ambient mode
- The user can use the rotary input to interact with the app’s functionality
💡 We have created an example app with all these bullet points addressed, so you can jump ahead to see how it works. We also plan to make a template out of this and add it to the Very Good CLI, so stay tuned. 👀
Okay then, so let’s get started by creating the app using very_good_cli:
very_good create flutter_app my_appcd my_appEnabling watch support
After that, the order of business is to remove the unnecessary files. Since we are making a standalone Wear OS-only app, we will only need runners for Android. Remove the macos, ios, web, linux and windows folders.
After that, we should add some useful plugins that we will use further down in this tutorial. Those are the wear and the wearable_rotary packages:
flutter pub add wear wearable_rotaryNow, to make the android runner able to run on Android devices, add the following line to the AndroidManifest.xml file:
package="com.example.veryGoodCore">+ ...Also, consider adding this metadata under the application tag to mark the app as standalone (this will be important when deploying in the store):
android:name="com.google.android.wearable.standalone" android:value="true" />Another file that should be adjusted is the MainActivity.kt file. This first change tells the OS to render the app without a background. This makes the app appears round on devices with rounded screens:
import android.os.Bundle
import androidx.annotation.NonNull
import android.view.MotionEvent
...

class MainActivity: FlutterActivity() {
...
    override fun onCreate(savedInstanceState: Bundle?) {
        intent.putExtra("background_mode", "transparent")
        super.onCreate(savedInstanceState)
    }
}
Later on, we will be using the wearable_rotary plugin. This means we have to add the following callback to the main activity:
import com.samsung.wearable_rotary.WearableRotaryPlugin
import android.view.MotionEvent
...

class MainActivity: FlutterActivity() {
...
    override fun onGenericMotionEvent(event: MotionEvent?): Boolean {
        return when {
            WearableRotaryPlugin.onGenericMotionEvent(event) -> true
            else -> super.onGenericMotionEvent(event)
        }
    }
}
Last but not least, let us update the Android SDK version constraints to match the added plugins, which, at the time of writing this article, was on minimum API level 25. Regardless of that, I strongly recommend setting the minimum SDK version to 30, which includes Wear OS 3 and above only. See why avoid Wear OS 2 and below.
To change the Android SDK constraints, change the build.gradle file:
... defaultConfig { minSdkVersion 30 targetSdkVersion 32...After this, you can run the app on an emulator or device.
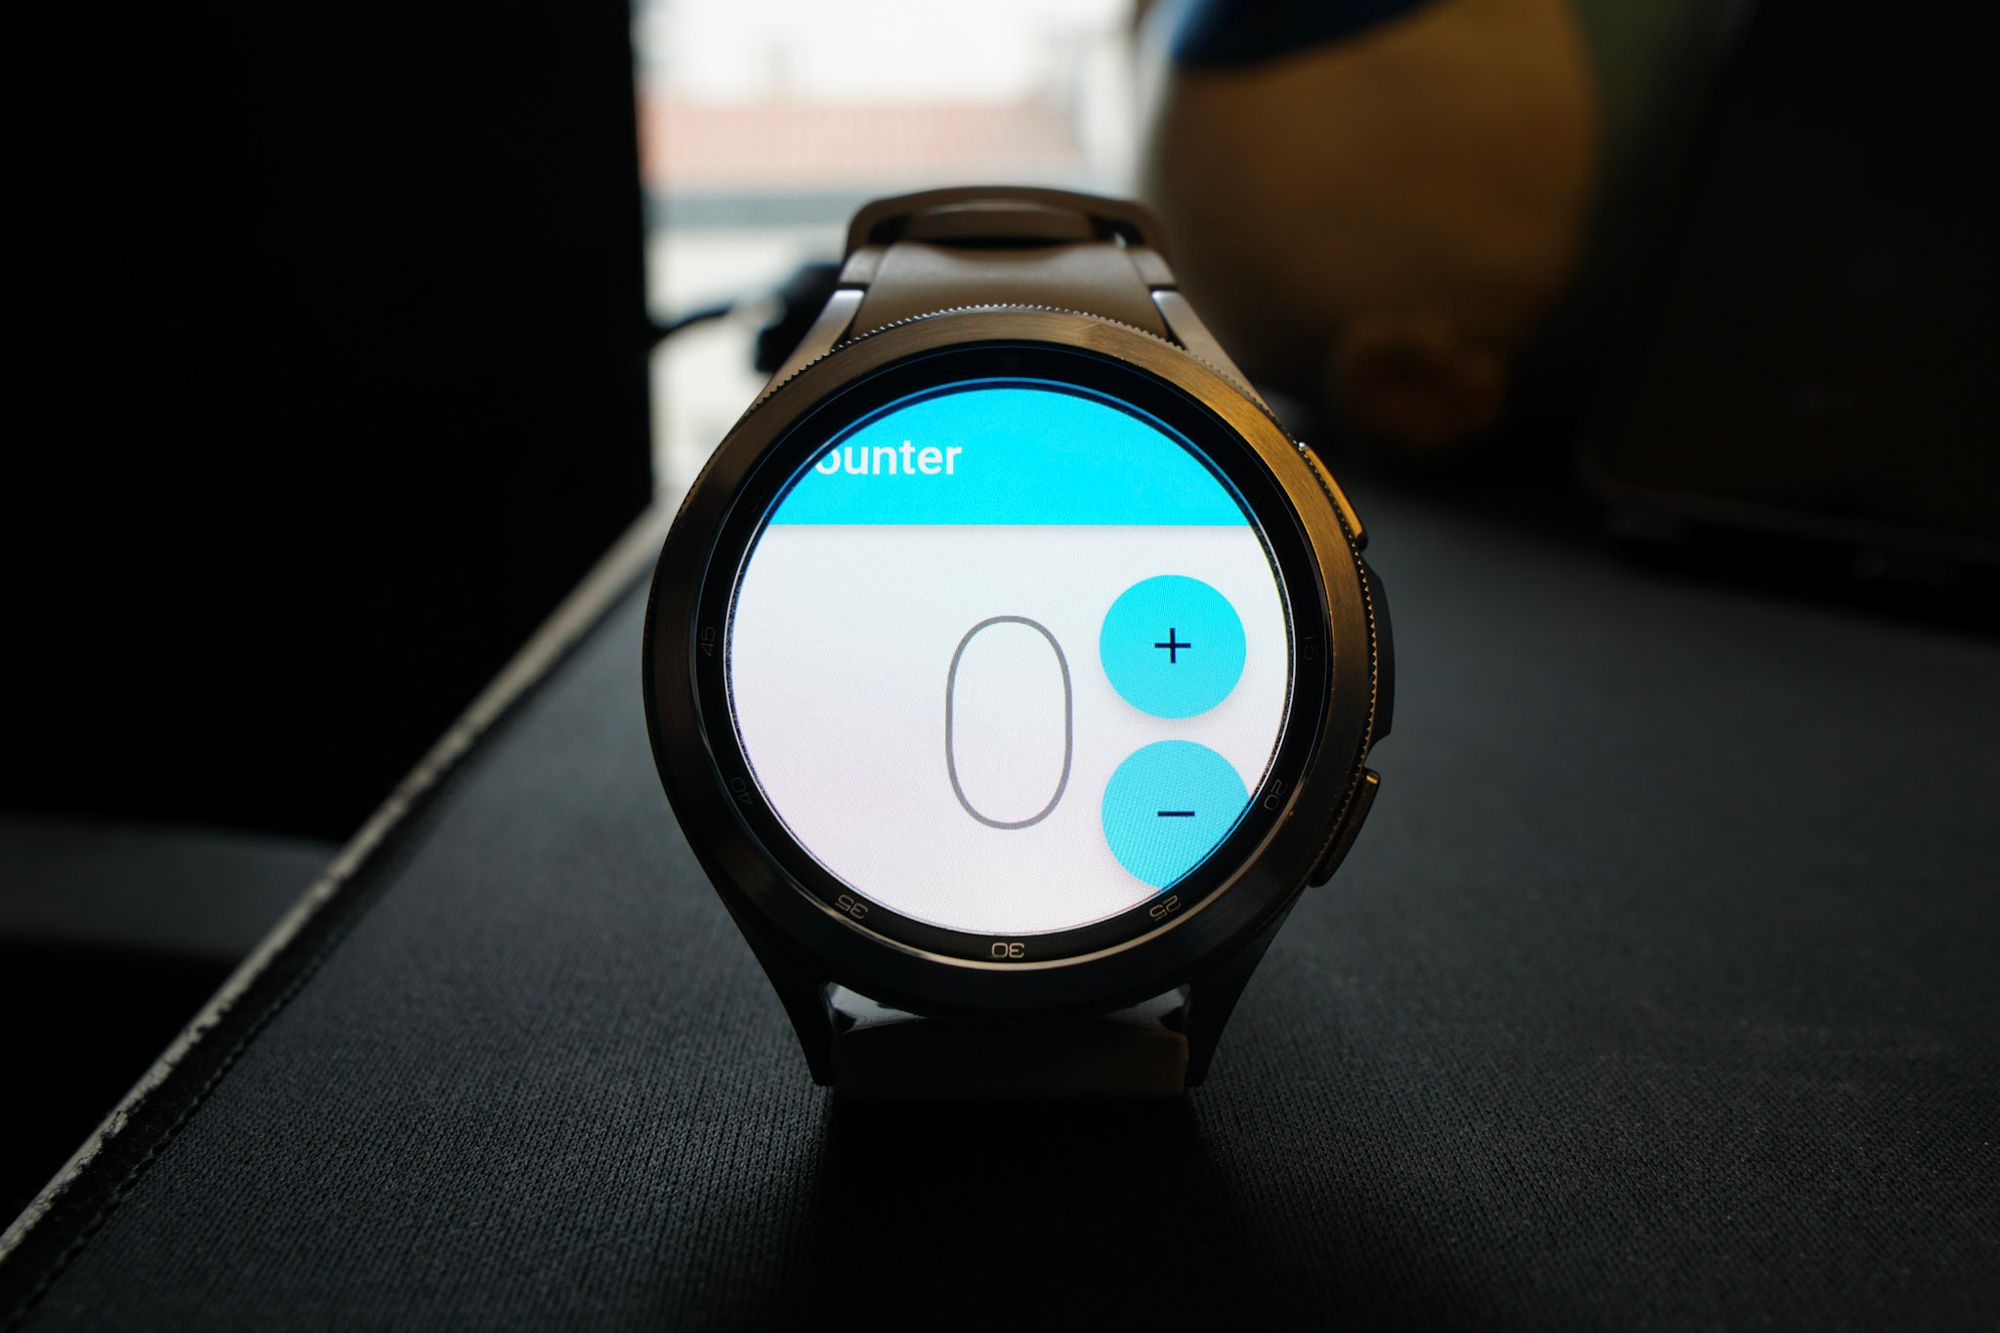
You will notice one thing about this: the UI looks squished. That is not very good! This happens because the current UI for the counter app was meant for smartphone screens, not watches. So let’s adapt that.
Adapting to watch support
We can use a few API resources to make Material apps fit those tiny screens, but it mostly comes down to good practices and being mindful of what should be on the screen at a time.
From the Material front, it could be a good start to set the visual density to compact:
...
@override
Widget build(BuildContext context) {
  return MaterialApp(
    theme: ThemeData(
      visualDensity: VisualDensity.compact,
...
This automatically sets up widgets like buttons and menus to have fewer pixels for padding and general spacing. I recommend using Material 3 since it is more visually compatible with most of the Wear OS 3’s system UI.
Also, I advise using dark backgrounds. Since most watches have dark bezels on OLED screens, this will help save some battery and will blend nicely on devices like the Pixel Watch.
...
@override
Widget build(BuildContext context) {
  return MaterialApp(
    theme: ThemeData(
      visualDensity: VisualDensity.compact,
      useMaterial3: true, // use material 3
      colorScheme: const ColorScheme.dark( // dark colorscheme
        primary: Colors.white24,
        onBackground: Colors.white10,
        onSurface: Colors.white10,
      ),
...
In our example, we also need to make some adjustments in the CounterPage widget, which we can change from this:
@override
Widget build(BuildContext context) {
  final l10n = context.l10n;
  return Scaffold(
    appBar: AppBar(title: Text(l10n.counterAppBarTitle)),
    body: const Center(child: CounterText()),
    floatingActionButton: Column(
      mainAxisAlignment: MainAxisAlignment.end,
      crossAxisAlignment: CrossAxisAlignment.end,
      children: [
        FloatingActionButton(
          onPressed: () => context.read<CounterCubit>().increment(),
          child: const Icon(Icons.add),
        ),
        const SizedBox(height: 8),
        FloatingActionButton(
          onPressed: () => context.read<CounterCubit>().decrement(),
          child: const Icon(Icons.remove),
        ),
      ],
    ),
  );
}
To something like this:
@override
Widget build(BuildContext context) {
  final l10n = context.l10n;
  return Scaffold(
    body: SizedBox.expand(
      child: Column(
        mainAxisAlignment: MainAxisAlignment.center,
        children: [
          ElevatedButton(
            onPressed: () => context.read<CounterCubit>().increment(),
            child: const Icon(Icons.add),
          ),
          const SizedBox(height: 10),
          Text(l10n.counterAppBarTitle),
          const CounterText(),
          const SizedBox(height: 10),
          ElevatedButton(
            onPressed: () => context.read<CounterCubit>().decrement(),
            child: const Icon(Icons.remove),
          ),
        ],
      ),
    ),
  );
}
We swapped the floating action buttons for elevated buttons and centered everything in a column.
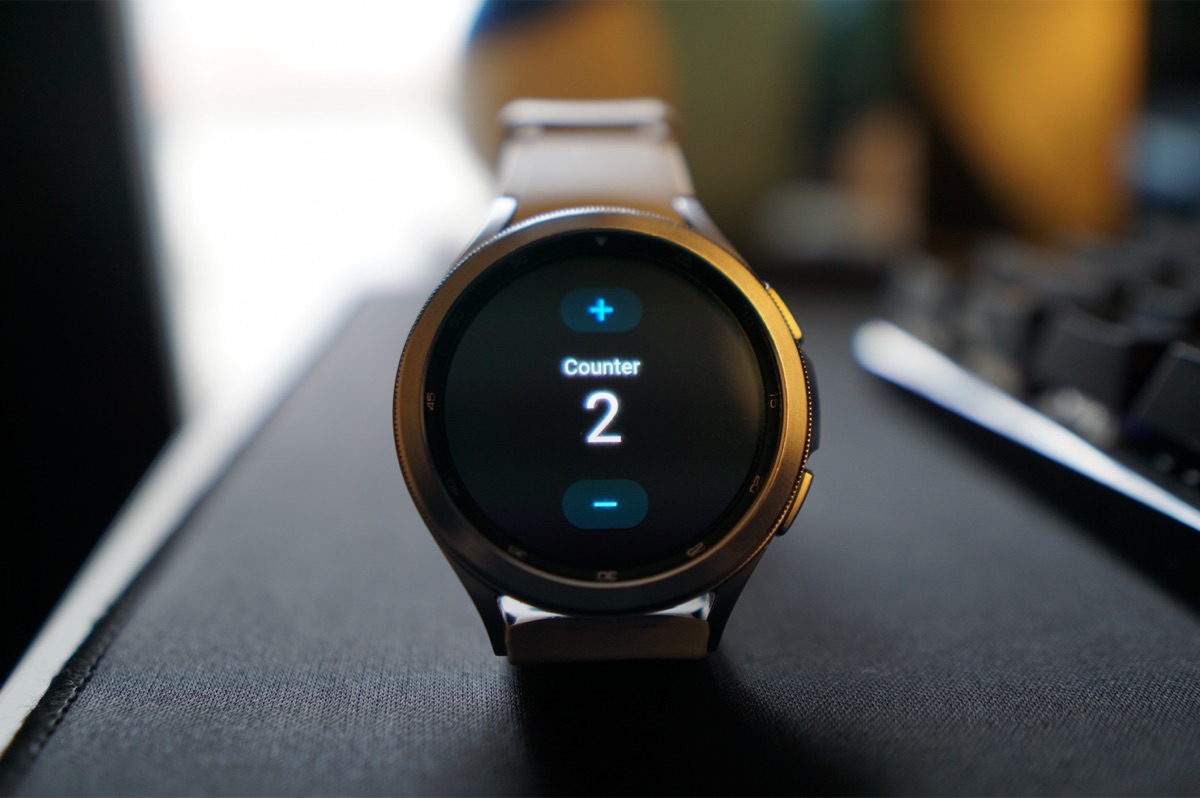
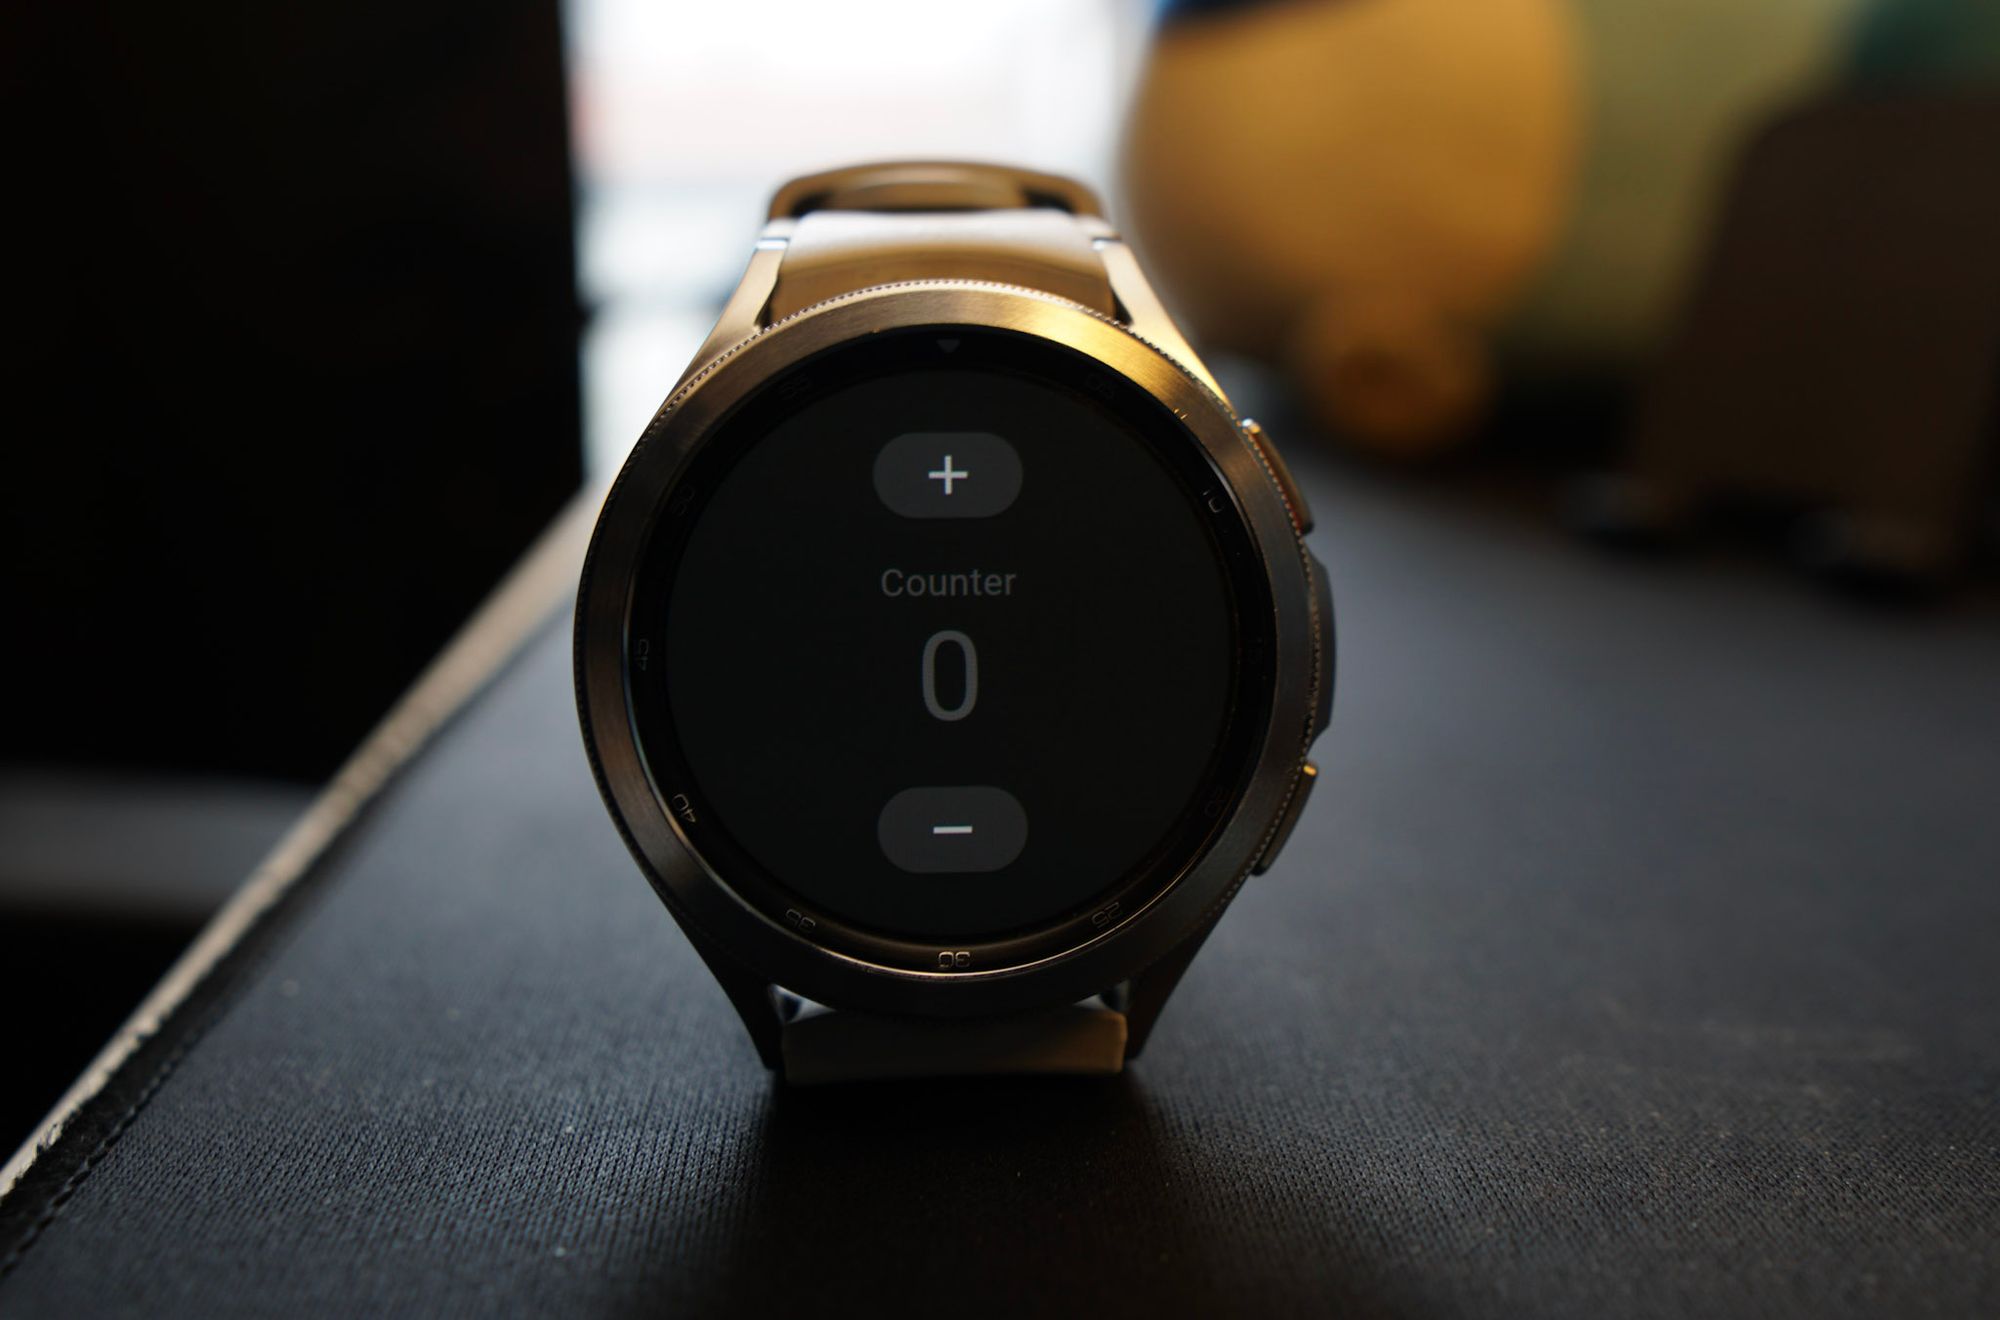
Now the app should look like this:

Taking advantage of watch support
It is looking good so far, but some cool hardware resources can further enrich the user experience. Despite all the sensors one can access through some plugins, we will focus today on two awesome plugins made by the community.
One is the wear plugin, maintained by the Flutter Community. This will give us access to the state of the ambient mode so that we can adapt the app appearance on low power mode.
The other is wearable_rotary, created by Tizen, which includes Wear OS support. This allows our Flutter code to receive events from the rotary inputs, such as the rotating bezel on Samsung Watches and the rotating crown on the Pixel Watch.
Adapting to ambient mode
When the always-on display is activated either in the watch’s settings or via the WAKE_LOCK android permission, the system may go into a “low power” mode while the application runs. This is called ambient mode. We can use wear’s widget AmbientMode to listen for when this mode is toggled on or off, and then adapt the Material colors accordingly.
The following code makes the app go monochromatic when in ambient mode:
import 'package:wear/wear.dart';

class App extends StatelessWidget {
...
  @override
  Widget build(BuildContext context) {
    // Add ambient mode support
    return AmbientMode(
      child: const CounterPage(),
      builder: (context, mode, child) {
        return MaterialApp(
          home: child,
          theme: ThemeData(
            useMaterial3: true,
            visualDensity: VisualDensity.compact,
            colorScheme: mode == WearMode.active
                ? const ColorScheme.dark(
                    primary: Color(0xFF00B5FF),
                  )
                : const ColorScheme.dark(
                    primary: Colors.white24,
                    onBackground: Colors.white10,
                    onSurface: Colors.white10,
                  ),
...
Example of the app going into ambient mode:
Additionally, this plugin allows us to get meta-information about the ambient mode via the AmbientDetails class. It is also possible to detect the shape of the screen.
Listening to rotary input
A nice feature for our little counter app would be to allow the user to increase and decrease the counting via the rotating bezel/crown. For that, we can listen to the rotaryEvents provided by the plugin and set the counter state from there:
...
class _CounterViewState extends State<CounterView> {
  late final StreamSubscription<RotaryEvent> rotarySubscription;

  @override
  void initState() {
    super.initState();
    rotarySubscription = widget.rotaryEvents.listen(handleRotaryEvent);
  }

  @override
  void dispose() {
    rotarySubscription.cancel();
    super.dispose();
  }

  void handleRotaryEvent(RotaryEvent event) {
    final cubit = context.read<CounterCubit>();
    if (event.direction == RotaryDirection.clockwise) {
      cubit.increment();
    } else {
      cubit.decrement();
    }
  }
...
Result:
Deploying to the app store
So far, so good, so easy. We have a Flutter app that looks and feels like it is made for smartwatches. But how do we release this so the world can download it directly onto their watches?
As expected, Wear OS apps are distributed via the Google Play Store (Samsung devices may use the Galaxy Store too).
There are some specific parts that need special attention to avoid a version rejection. Those are:
- Standalone apps must mention Wear OS on their pages, in the description, and in the title.
- There must be screenshots for multiple screen sizes, resolutions, and shapes. It is encouraged to produce them on emulators.
- Wear OS screenshots are far more restricted than apps for smartphones . Screenshots should contain the app interface and the app interface only. Don’t include photos of devices.
The first published version of the app will go through two approval phases. The first one should be just like any Android app. See the official docs on deploying a Flutter app in the Play Store.
After that version is approved, the app should be visible in the store, but people still won’t be able to install them on Wear OS devices. Wear OS apps require a special format so they can be installed on wearable devices. For that:
- Open the page of your app in the Play Store console.
- Go to Advanced Settings in the sidebar.
- Navigate to the Form factors tab and add Wear OS.
That will create a step-by-step form so you can provide additional Wear OS-specific information that appears on your store’s page.

After finishing that form, another review process will start to see if the given app is fit to run on people’s watches. Make sure that the aforementioned requirements are met. After the second approval step, the application should appear in the store.
Congratulations, now you can brag around that you are a smartwatch developer 🥳
{% embed url=“https://media.giphy.com/media/DhstvI3zZ598Nb1rFf/giphy-downsized-large.gif” title=“Video” %}
But hold on! Time for the not so good news because we need to talk about the…
Apple Watch support
Unlike Wear OS, watchOS (Apple’s watch operating system; confusing names, I know) is not just a smartphone OS with a different logo and a few bespoke APIs (ok, it is almost that). WatchKit changes the game more than its Android counterpart.
In this Flutter issue, Jenn Magder lists a set of procedures that must be done in the framework and engine for sound support for this type of device. As far as we know, running Flutter and Apple Watches is not as straightforward as it is for Wear OS.
We decided not to cover the Apple Watch in this tutorial since this is still unknown territory. But if there is one thing about Flutter that time has proved again and again, is that: if it has a screen, it will run Flutter, eventually.

