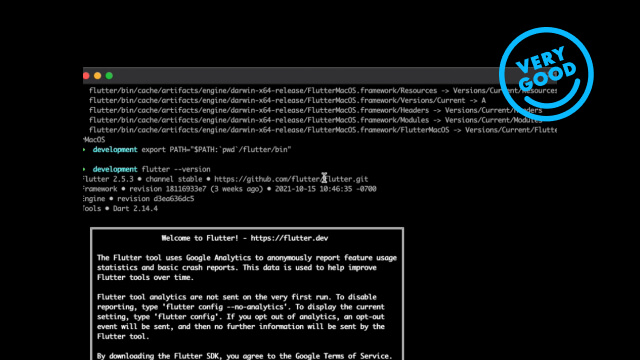
A very Good Flutter Setup
A very good guide to configuring your local environment for Flutter projects

If you're looking for a very good guide to help you install and configure your local environment to work on Flutter projects, you've come to the right place! This article will walk you through this process.
You will find a setup section with step-by-step instructions for installation and configuration, which includes common errors, code snippets, screenshots, and (lots of) GIFs.
Note that this is an opinionated guide to configuring your local environment according to our preferences — feel free to use whatever setup works best for you. As we primarily use macOS for Flutter development at VGV, this article is written for macOS users and assumes you have Google Chrome installed on your machine.
Set Up ⚙️
Before getting started, be aware this process may be a lengthy one due to the size of some of the installation packages and downloads.
1 - Xcode
You will need the latest stable version of XCode on your Mac to develop Flutter apps for iOS. You can download it directly from the App Store.
This is by far the lengthiest step, and it may take a while to complete depending on your Internet connection and machine.
So, in the meantime, you can check these fun resources on Flutter:
- The Boring Development Show
- Flutter Widget of the Week
- Flutter Package of the Week
- Flutter Developer Stories
- Decoding Flutter
- Dart playlist
Once the download has been completed, you will find the Xcode icon showing the installation progress on your Launchpad.
It's highly advisable not to continue with any of the following steps until this process has been fully completed to avoid potential issues.
Are you still there? Good! You now need to open Xcode for the first time to Agree on the Xcode and Apple SDKs Agreement. Have your macOS user's password ready, as you'll be prompted to enter it to install all the required components. Et voilà! 🎉
To check that everything has been completed successfully, press Command ⌘ + Space Bar, type Terminal, and press Enter ↩. This will open a terminal window where you'll need to type:
Hit Enter ↩ again. You should see the Xcode version you've just installed as well as its build version id.
2 - iTerm + Oh My Zsh
Speaking of a Terminal: How about we get a nicer one? Simply go to the iTerm website and download it. Getting it installed on your Mac is as easy as unzipping the .zip file in your Downloads folder and then double-clicking on the unzipped iTerm.
To ensure you've installed it correctly, type the following into the opened iTerm window.
Do you want to make it even neater? That's what Oh My Zsh is for. This open-source, community-driven framework "takes advantage of the hundreds of powerful plugins and beautiful themes" while managing your Zsh configuration. To get it installed, just copy and paste this command into your iTerm window and hit Enter ↩.
3 - Homebrew
This installation is not required to get Flutter working on your machine, but it is required if you want to streamline downloading and maintaining packages. As the people behind this handy project said, it is "The Missing Package Manager for macOS (or Linux)." So, are you ready for another lengthy install?
Let's download and install it all at once. Copy the following command into an iTerm window and press Enter ↩.
If it seems like it's stuck while Downloading Command Line Tools, you’re not alone. This part of the process may take a while. If it seems like progress is going slowly, you can check that the download is being completed successfully by clicking on the Apple icon found at the top left corner → About This Mac → Storage → See how the available space on your Macintosh HD decreases. Once this download is complete, the process should continue and finish successfully.
As usual, you can check that everything went okay by checking the brew version you just installed.
4 - Git
The previous Xcode installation also included git, so there's no need to install it separately. However, if you'd like to have Homebrew manage git, you could simply execute brew install git in an iTerm window.
5 - LCOV
"LCOV is a graphical front-end for GCC's coverage testing tool gcov." Once again, this tool is not needed to get Flutter working on your machine, but it comes in handy when testing your code. What it lacks in appealing graphics it makes up for in simplicity and usefulness! Besides, it's the shortest installation, and it sure is worth the five seconds it takes to get it on your machine - Execute in an iTerm window, and you'll be done.
Feels good after installing Xcode, doesn't it?
6 - Android Studio
Back to things required for a proper and successful Flutter installation, it's time to address the green Android in the room. You need to install Android Studio to get the Android SDK, but as you'll see in the following steps, we'll be using Visual Studio Code for Flutter Development as our preferred IDE. Again, this is an opinionated guide, so feel free to use whichever IDE works best for you.
To download Android Studio, navigate to the official website, click download, accept the terms and conditions, and select the kind of Mac you're using — I used Mac with Intel chip in this tutorial, but if you have a newer Mac from 2020 onward with an M1 (Apple Silicon) chip, choose "Mac with Apple chip" instead.
Once the download is completed, open the .dmg file and drag Android Studio into the Applications folder. Finally, open Android Studio and complete the initial configuration steps as shown below.
7 - Flutter
If you've made it this far, you’re ready to finally install Flutter!
This article won't go too in-depth into the whole installation process as the official get-started installation guide does an outstanding job at walking you through each step. However, you can complement that guide with the steps presented below to avoid potential issues — or vice versa 😉.
First, download the flutter_macos_-stable.zip archive from the official guide. This will place a .zip file in your Downloads folder.
Moving on, open an iTerm window and check that your present working directory is /Users/<your_user>. Otherwise, execute the following commands to navigate to that directory, create a new directory, and navigate into it.
Notice we named it development as it is a common practice among developers. Nonetheless, feel free to name it however you'd like.
Lastly, unzip the previously downloaded Flutter installation bundle containing the latest stable release of the Flutter SDK by typing unzip and then dragging the .zip file into the iTerm window — this will avoid potential path errors. Press Enter ↩ and wait for the process to complete. Then, add the Flutter tool to your path by executing the following.
Notice that this is a temporary path used to check if everything is fine for now.
You should now be able to check the version you just installed.
If you now run:
you'll notice there are a few checks that are failing. So, let's take care of that right now.
Let's permanently add Flutter to our path by navigating back to your user directory and opening the .zshrc file with the following commands:
This will open a file where you'll need to copy and paste the following configurations:
Press Control ^ + X to close the file, then press Y to save it, and Enter ↩ to go back to the command line.
That being done, we can check that an iOS simulator can be opened executing:
Enter your password when prompted and then hit Enter ↩. You should now be able to open an iOS simulator by executing:
Next up, fixing the infamous cocoapods error. Running:
may produce a very verbose error indicating that the process failed. Nonetheless, the solution is quite simple, and all you need to do is execute the following two commands.
Let's now configure Android Studio so we can run and test Flutter on an Android Emulator. Open Android Studio → More Actions → AVD Manager. This will open the Android Virtual Device Manager, where you need to click on + Create Virtual Device... Among all the options listed under Phone, choose the newest device found at the very top - Pixel XL, when writing this article.
Click Next, and download the latest system image - R, when writing this article. Accept the Terms and Conditions and wait for the installation to complete. Click Next, and in this screen, change the Graphics to Hardware - GLES 2.0. Click on Finish... and close Android Studio before your RAM starts complaining.
You can now Agree to the necessary Android Licenses. So head on over to iTerm, run:
and accept them as they come.
An additional device you may want to run your Flutter projects on is your own Mac. To enable desktop support, execute:
Last but not least, you need to add a few additional commands to your .zshrc file. Execute:
to open the file, and copy the following configurations:
Then press control ^ + x to close the file, then press y to save it, and Enter ↩ to go back to the command line.
And that's it! All the problems should now be gone, which you can check by seeing all the green check marks after running:
8 - Node.js
This step is optional. You might consider installing the latest Node.js LTS, which includes npm. Thanks to Homebrew, all you need to do is execute:
and check that it's been successfully installed by executing:
9 - Visual Studio Code
There are plenty of IDEs to work on Flutter development, but we tend to prefer VS Code. This popular, open-source IDE is easy to use, offers powerful developer tooling, and supports countless extensions to enhance your coding experience. The good news is that Flutter editor plugins are supported by Android Studio, IntelliJ, VS Code, or Emacs, so feel free to use the one that best suits your needs.
Having said that, let's download it and install it by unzipping the downloaded .zip file. Then, simply move the unzipped VS Code application into your Applications directory. Finally, as you did in previous steps, add the following configurations to your .zshrc file located in your Home (~) directory:
Perhaps the most compelling and impressive feature about VS Code is the range of extensions that you can add to tune your programming experience to your liking.
Here's a list of extensions you might consider adding:
- Dart
- Flutter
- vscode-icons
- Code Spell Checker
- bloc
- GitLens — Git supercharged
- Path Intellisense
- Dart Data Class Generator
- Awesome Flutter Snippets
- Dart Barrel Export File Generator
If you've never used VS Code and would like to familiarize yourself with it, check out Flutter's official guide, which covers how to create, edit, run and debug projects, among other useful information.
10 - Flutter Version Management (fvm)
Flutter is an amazing toolkit that enables developers to build exceptional applications. However, managing its different SDK versions, switching between channels, and using the correct configurations in separate projects can become cumbersome. One way to handle these potential complications is to use fvm. Let's download and install it. Start by running sequentially:
Let's now set Flutter's stable SDK globally by running:
which will prompt you to install it.
Then, let's also install the beta SDK by executing:
Once it completes, run the following command to check you have two different SDKs available through fvm.
Lastly, modify VS Code's settings.json file to have access to fvm by adding:
Congratulations! You've successfully completed this guide, and you now have a robust, convenient, and very good Flutter setup on your Mac 👏
Óscar Martín, Jay Meijer, and Felix Angelov contributed to this article.
Insights from Our Experts

Loyalty is a Product, Not a Program: How Modern Brands Build Habit-Forming Engagement
Lorem ipsum dolor sit amet, consectetur adipiscing elit. Suspendisse varius enim in eros elementum tristique. Duis cursus, mi quis viverra ornare, eros dolor interdum nulla, ut commodo diam libero vitae erat. Aenean faucibus nibh et justo cursus id rutrum lorem imperdiet. Nunc ut sem vitae risus tristique posuere.

Braze Intelligence Isn’t Hype—It’s a Performance Multiplier Humans Can’t Compete With
Lorem ipsum dolor sit amet, consectetur adipiscing elit. Suspendisse varius enim in eros elementum tristique. Duis cursus, mi quis viverra ornare, eros dolor interdum nulla, ut commodo diam libero vitae erat. Aenean faucibus nibh et justo cursus id rutrum lorem imperdiet. Nunc ut sem vitae risus tristique posuere.

Mobile Ordering That Works in the Real World: Scalable Flutter Solutions for Theme Parks, QSR, Cruise Lines & Entertainment Venues
Lorem ipsum dolor sit amet, consectetur adipiscing elit. Suspendisse varius enim in eros elementum tristique. Duis cursus, mi quis viverra ornare, eros dolor interdum nulla, ut commodo diam libero vitae erat. Aenean faucibus nibh et justo cursus id rutrum lorem imperdiet. Nunc ut sem vitae risus tristique posuere.


