In this tutorial we’re going to take the Flutter example that Supabase provides and rewrite it using VGV tooling, such as Very Good CLI, Flutter Bloc, layered architecture, and the most important thing, 100% test coverage 🧪.
This tutorial is based on the Quickstart: Flutter tutorial that Supabase has on their website. It will target Android, iOS, and the web.
Let’s get started! 🙌
But first, what is Supabase?
Supabase is an open source Firebase alternative. As a quick overview, Supabase offers you a bunch of services, like authentication with different providers (email, Apple, Azure, Discord, GitHub, GitLab, Bitbucket, Slack and much more), database (PostgreSQL), storage, functions, etc.
If you’re looking to have more auth providers than the typical ones (email/password, Twitter, Facebook, Google, and Apple) or a SQL database instead of a NoSQL database, you could consider Supabase for your project. To learn more about Supabase, visit their official website here.
💡Overview
These are the things that we are going to cover in this tutorial:
- Login with email using deep linking.
- Handle user status (authenticated or unauthenticated) to know where we need to navigate using Flow Builder.
- Create a simple database with a script on the Supabase SQL Editor console.
- Add rules to the database.
- Update user information in the database.
Supabase initial configuration
Create a new project
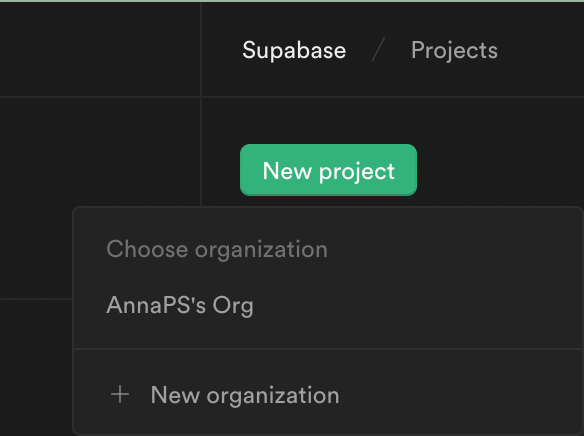
The first step is to visit the Supabase website and create a login. When we have access to the dashboard, we can create a new organization and project.
- Click on New Project and select your organization (if you don’t have one, you should create a new one by clicking on New organization). The next step is to fill out the form to create a new project.
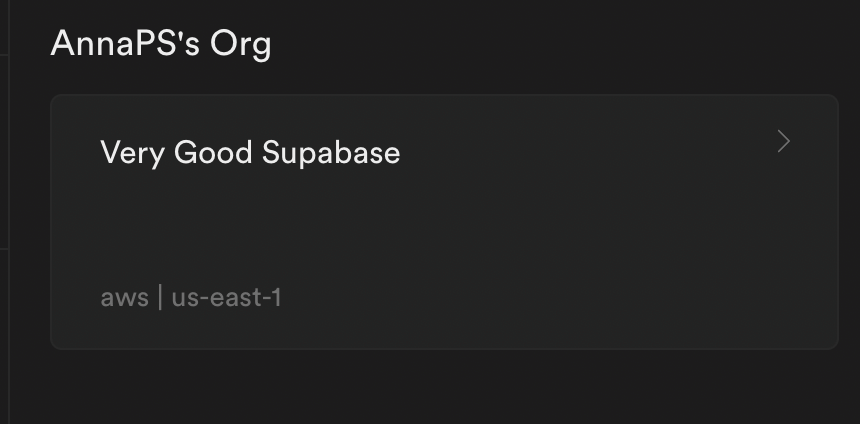
- We can now see the new project on our dashboard.
Create a database with SQL Editor
To create a new database in our project, we should navigate to SQL Editor where we can create a script to create the table and the rules to apply in this database.
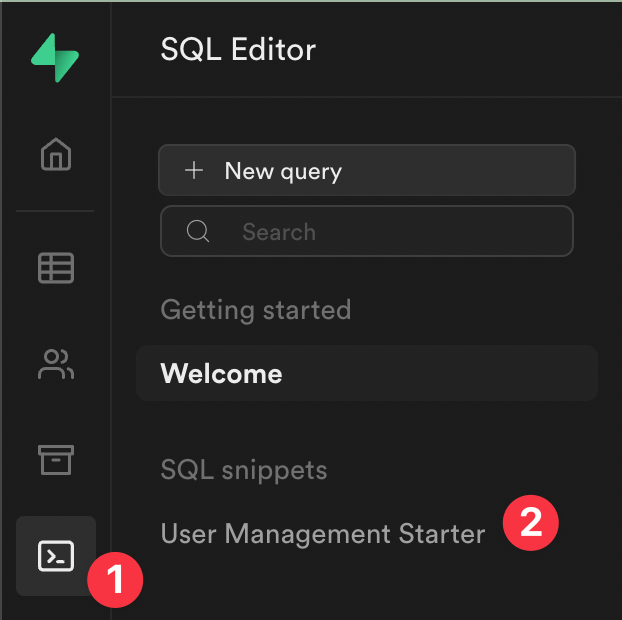
In this case, we are going to create a table called account. We need to modify the User Management Started script and add the following code:
-- Create a table for Public Account
create table account (
  id uuid references auth.users not null,
  username text unique,
  companyName text,
  primary key (id),
  unique(username),
  constraint username_length check (char_length(username) >= 3)
);

alter table account
  enable row level security;

create policy "Public account are viewable by everyone." on account
  for select using (true);

create policy "Users can insert their own account." on account
  for insert with check (auth.uid() = id);

create policy "Users can update their own account." on account
  for update using (auth.uid() = id);

-- Set up Realtime!
begin;
  drop publication if exists supabase_realtime;
  create publication supabase_realtime;
commit;

alter publication supabase_realtime
  add table account;
Then, we need to click on RUN in the right bottom corner. Finally we have our new database created.
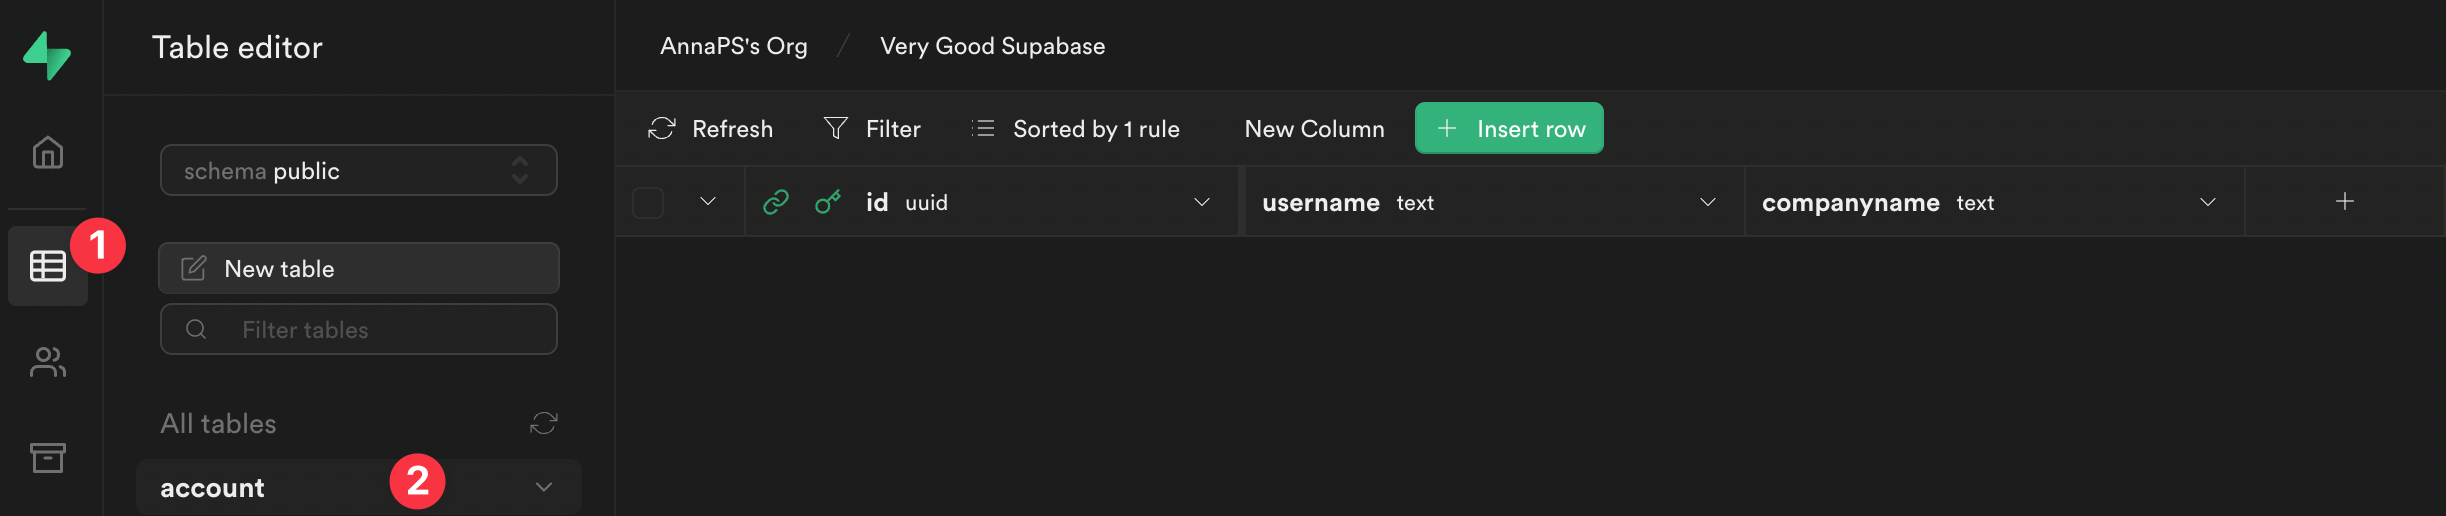
Supabase table editor
Once the database is created, we can navigate throughout the dashboard to view the table and rules.
In the left menu, we can navigate to table editor to see the account table. It is currently empty, but you can see that the table has three columns id, username and companyname.
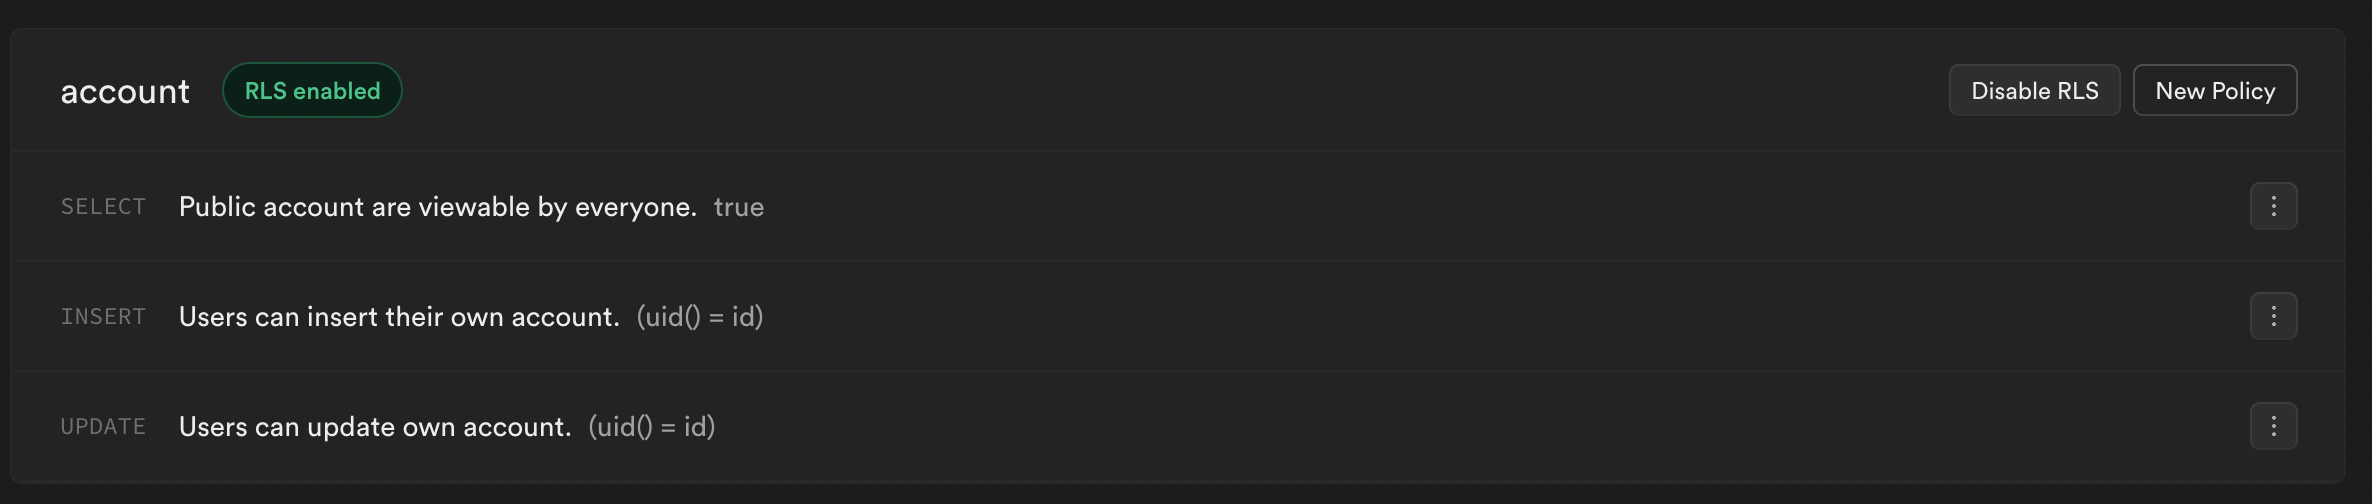
If you want to check the rules that we created with the script, you can click on RLS enabled to see them.
Authentication configuration
As I mentioned at the beginning, the authentication method that we are going to use in this tutorial is email deep linking.
We need to add a redirect URL in our authentication dashboard (this is only if your application is on the web).
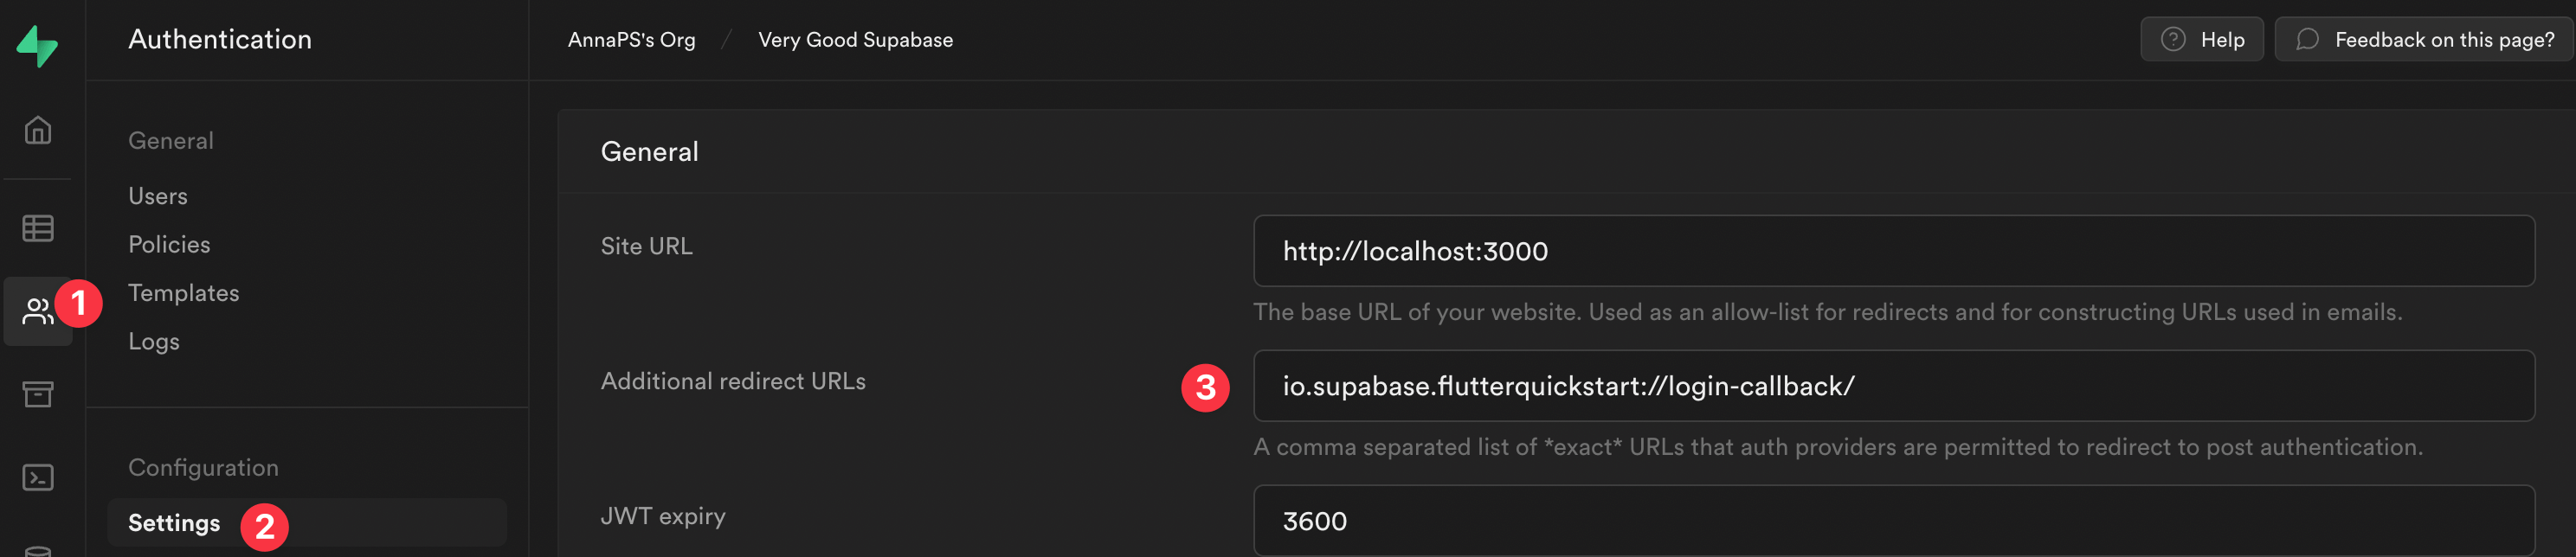
In this case, we are going to use the redirect URL that Supabase provides in the Flutter example. You should add the provider redirect URL if you are building a real project.
io.supabase.flutterquickstart://login-callback/Now, we have everything set up and the next step is to create our Flutter project! 🙌
Flutter project and packages
In this section we are going to create the Flutter project and different packages using Very Good CLI.
The first step is to activate Very Good CLI.
dart pub global activate very_good_cliOnce we have Very Good CLI activated, we can create the Flutter project. We just have to run the following line in the terminal.
very_good create very_good_supabase --desc "Example of a Flutter application using Very Good CLI and Supabase"Which packages do we need for this project? 🤔
I’ve created a few of them under the package folder (you should create them in your application root).
- Supabase auth client: this package is in charge of the sign-in and sign-out methods on Supabase.
- Supabase database client: this package is in charge of get user information from the database and updating user information.
- User repository: this repository is going to have the ability to use the SupabaseAuthClient to call the sign-in and sign-out methods, use the SupabaseDatabaseClient to get user profile information, and update the user on Supabase.
- Form inputs: this package hosts the different form inputs to use on the view.
- Email launcher: opens a default email app on Android and iOS.
You can visit the GitHub repository to see the code of the Form inputs and Email launcher packages. Here I’m only going to cover the packages related to Supabase.
Let’s create them! 😀
Supabase auth client
First we need to run the following command:
very_good create supabase_auth_client -t flutter_pkg --desc "Supabase auth client"Then we should modify the pubspec.yaml file to add the necessary dependencies.
name: supabase_auth_client
description: Supabase auth client
publish_to: none

environment:
  sdk: ">=2.17.0 <3.0.0"

dependencies:
  flutter_test:
    sdk: flutter
  supabase_flutter: ^0.3.1

dev_dependencies:
  flutter:
    sdk: flutter
  mocktail: ^0.3.0
  very_good_analysis: ^3.0.1
Now we can add the logic for this package. In this part we are going to be focused on the sign-in and sign-out methods.
/// {@template supabase_auth_client}
/// Supabase auth client
/// {@endtemplate}
class SupabaseAuthClient {
  /// {@macro supabase_auth_client}
  SupabaseAuthClient({
    required GoTrueClient auth,
  }) : _auth = auth;

  final GoTrueClient _auth;

  /// Method to do sign in on Supabase.
  Future signIn({
    required String email,
    required bool isWeb,
  }) async {
    try {
      await _auth.signIn(
        email: email,
        options: AuthOptions(
          redirectTo:
              isWeb ? null : 'io.supabase.flutterquickstart://login-callback/',
        ),
      );
    } catch (error, stackTrace) {
      Error.throwWithStackTrace(SupabaseSignInFailure(error), stackTrace);
    }
  }

  /// Method to do sign out on Supabase.
  Future signOut() async {
    try {
      await _auth.signOut();
    } catch (error, stackTrace) {
      Error.throwWithStackTrace(SupabaseSignOutFailure(error), stackTrace);
    }
  }
}
Supabase database client
First you need to create the package.
very_good create supabase_database_client -t flutter_pkg --desc "Supabase database client"Then modify the pubspec.yaml file.
name: supabase_database_client
description: Supabase database client
publish_to: none

environment:
  sdk: ">=2.17.0 <3.0.0"

dependencies:
  equatable: ^2.0.3
  flutter:
    sdk: flutter
  json_annotation: ^4.5.0
  json_serializable: ^6.2.0
  mocktail: ^0.3.0
  supabase_flutter: ^0.3.1

dev_dependencies:
  build_runner: ^2.1.11
  flutter_test:
    sdk: flutter
  very_good_analysis: ^3.0.1
The next step is to add the logic to this package. In this case, this package is going to be in charge of retrieving user information from the account table and also to updating the data on the account table.
First, we need to create a SupabaseUser model. To do that, we can create a new folder inside src called models. Then add the new supabase_user.dart file inside it. For this model I used the Json Serializable package.
/// {@template supabase_user}
/// Supabase user model
/// {@endtemplate}
@JsonSerializable()
class SupabaseUser extends Equatable {
  /// {@macro supabase_user}
  const SupabaseUser({
    String? id,
    required this.userName,
    required this.companyName,
  }) : id = id ?? '';

  /// Connect the generated [_$SupabaseUserFromJson] function to the `fromJson`
  /// factory.
  factory SupabaseUser.fromJson(Map json) =>
      _$SupabaseUserFromJson(json);

  /// Id of the user.
  final String id;

  /// Name of the supabase user.
  @JsonKey(name: 'username')
  final String userName;

  /// Company name of the supabase user.
  @JsonKey(name: 'companyname')
  final String companyName;

  @override
  List get props => [id, userName, companyName];

  /// Empty Supabase object.
  static const empty = SupabaseUser(
    userName: '',
    companyName: '',
  );

  /// Connect the generated [_$SupabaseUserToJson]
  /// function to the `toJson` method.
  Map toJson() => _$SupabaseUserToJson(this);
}
The next step is to add the logic in the supabase_database_client.dart file.
/// {@template supabase_database_client}
/// Supabase database client
/// {@endtemplate}
class SupabaseDatabaseClient {
  /// {@macro supabase_database_client}
  const SupabaseDatabaseClient({
    required SupabaseClient supabaseClient,
  }) : _supabaseClient = supabaseClient;

  final SupabaseClient _supabaseClient;

  /// Method to get the user information by id
  /// from the profiles database on Supabase.
  Future getUserProfile() async {
    try {
      final response = await _supabaseClient
          .from('account')
          .select()
          .eq('id', _supabaseClient.auth.currentUser?.id)
          .single()
          .execute();
      final data = response.data as Map
      return SupabaseUser.fromJson(data);
    } catch (error, stackTrace) {
      Error.throwWithStackTrace(
        SupabaseUserInformationFailure(error),
        stackTrace,
      );
    }
  }

  /// Method to update the user information on the profiles database.
  Future updateUser({required SupabaseUser user}) async {
    try {
      final supabaseUser = SupabaseUser(
        id: _supabaseClient.auth.currentUser?.id,
        userName: user.userName,
        companyName: user.companyName,
      );
      await _supabaseClient
          .from('account')
          .upsert(supabaseUser.toJson())
          .execute();
    } catch (error, stackTrace) {
      Error.throwWithStackTrace(
        SupabaseUpdateUserFailure(error),
        stackTrace,
      );
    }
  }
}
User repository
The first step is to create the package.
very_good create user_repository -t flutter_pkg --desc "A package which manages the user domain."The second step is to modify the pubspec.yaml file to add the dependencies.
name: user_repository
description: A package which manages the user domain
publish_to: none

environment:
  sdk: ">=2.17.0 <3.0.0"

dependencies:
  equatable: ^2.0.3
  flutter:
    sdk: flutter
  mocktail: ^0.3.0
  supabase_auth_client:
    path: ../supabase_auth_client
  supabase_database_client:
    path: ../supabase_database_client
  supabase_flutter: ^0.3.1

dev_dependencies:
  flutter_test:
    sdk: flutter
  very_good_analysis: ^3.0.1
Now we can add the logic for this package. In this repository we can use the SupabaseAuthClient and SupabaseDatabaseClient to be able to use the methods inside of each class. With this repository we can do the following:
- Sign-in
- Sign-out
- Fetch User information
- Update user
/// {@template user_repository}
/// A package which manages the user domain.
/// {@endtemplate}
class UserRepository {
  /// {@macro user_repository}
  UserRepository({
    required SupabaseAuthClient authClient,
    required SupabaseDatabaseClient databaseClient,
  })  : _authClient = authClient,
        _databaseClient = databaseClient;

  final SupabaseAuthClient _authClient;
  final SupabaseDatabaseClient _databaseClient;

  /// Method to access the current user.
  Future getUser() async {
    final supabaseUser = await _databaseClient.getUserProfile();
    return supabaseUser.toUser();
  }

  /// Method to update user information on profiles database.
  Future updateUser({required User user}) {
    return _databaseClient.updateUser(user: user.toSupabaseUser());
  }

  /// Method to do signIn.
  Future signIn({required String email, required bool isWeb}) async {
    return _authClient.signIn(email: email, isWeb: isWeb);
  }

  /// Method to do signOut.
  Future signOut() async => _authClient.signOut();
}

extension on SupabaseUser {
  User toUser() {
    return User(
      id: id,
      userName: userName,
      companyName: companyName,
    );
  }
}

extension on User {
  SupabaseUser toSupabaseUser() {
    return SupabaseUser(
      id: id,
      userName: userName,
      companyName: companyName,
    );
  }
}
We’re finished configuring the packages. Now we can jump into the business logic and views.
Note: These packages need different workflows to work with GitHub workflows. We can find these files in the .github folder in the example repository.
Supabase in Flutter
Native configuration
The first step is to configure Supabase in our project. First we need to add a few native configurations on Android and iOS.
- Android: add these lines to the AndroidManifest.xml file.
<intent-filter>
    <action android:name="android.intent.action.VIEW" />
    <category android:name="android.intent.category.DEFAULT" />
    <category android:name="android.intent.category.BROWSABLE" />
    <data
        android:scheme="io.supabase.flutterquickstart"
        android:host="login-callback" />
</intent-filter>- iOS: add these lines to the Info.plist file.
<key>CFBundleURLTypes</key>
<array>
    <dict>
        <key>CFBundleTypeRole</key>
        <string>Editor</string>
        <key>CFBundleURLSchemes</key>
        <array>
            <string>io.supabase.flutterquickstart</string>
        </array>
    </dict>
</array>
Prepare the Flutter project to use Supabase
Here we need to do a few things. First, we need to update the pubspec.yaml file in our project to be able to use all the packages that we just created, as well as the Supabase dependency.
name: very_good_supabase
description: Example of a flutter application to use Very Good CLI and Supabase
version: 1.0.0+1
publish_to: none

environment:
  sdk: ">=2.17.0 <3.0.0"

dependencies:
  bloc: ^8.0.3
  email_launcher:
    path: packages/email_launcher
  equatable: ^2.0.3
  flow_builder: ^0.0.8
  flutter:
    sdk: flutter
  flutter_bloc: ^8.0.1
  flutter_dotenv: ^5.0.2
  flutter_localizations:
    sdk: flutter
  form_inputs:
    path: packages/form_inputs
  intl: ^0.17.0
  mockingjay: ^0.3.0
  mocktail_image_network: ^0.3.1
  supabase_auth_client:
    path: packages/supabase_auth_client
  supabase_database_client:
    path: packages/supabase_database_client
  supabase_flutter: ^0.3.0
  user_repository:
    path: packages/user_repository

dev_dependencies:
  bloc_test: ^9.0.3
  flutter_test:
    sdk: flutter
  mocktail: ^0.3.0
  very_good_analysis: ^3.0.1

flutter:
  uses-material-design: true
  generate: true
  assets:
    - assets/images/
    - assets/.env
The second step is to prepare the main_development.dart file to use the necessary packages and initialize Supabase.
void main() async {
WidgetsFlutterBinding.ensureInitialized();
await dotenv.load(fileName: 'assets/.env');
await Supabase.initialize(
url: dotenv.get('SUPABASE_URL'),
anonKey: dotenv.get('ANON_KEY'),
);
await bootstrap(() {
final authClient = SupabaseAuthClient(
auth: Supabase.instance.client.auth,
);
final databaseClient = SupabaseDatabaseClient(
supabaseClient: Supabase.instance.client,
);
final userRepository = UserRepository(
authClient: authClient,
databaseClient: databaseClient,
);
return App(userRepository: userRepository);
});
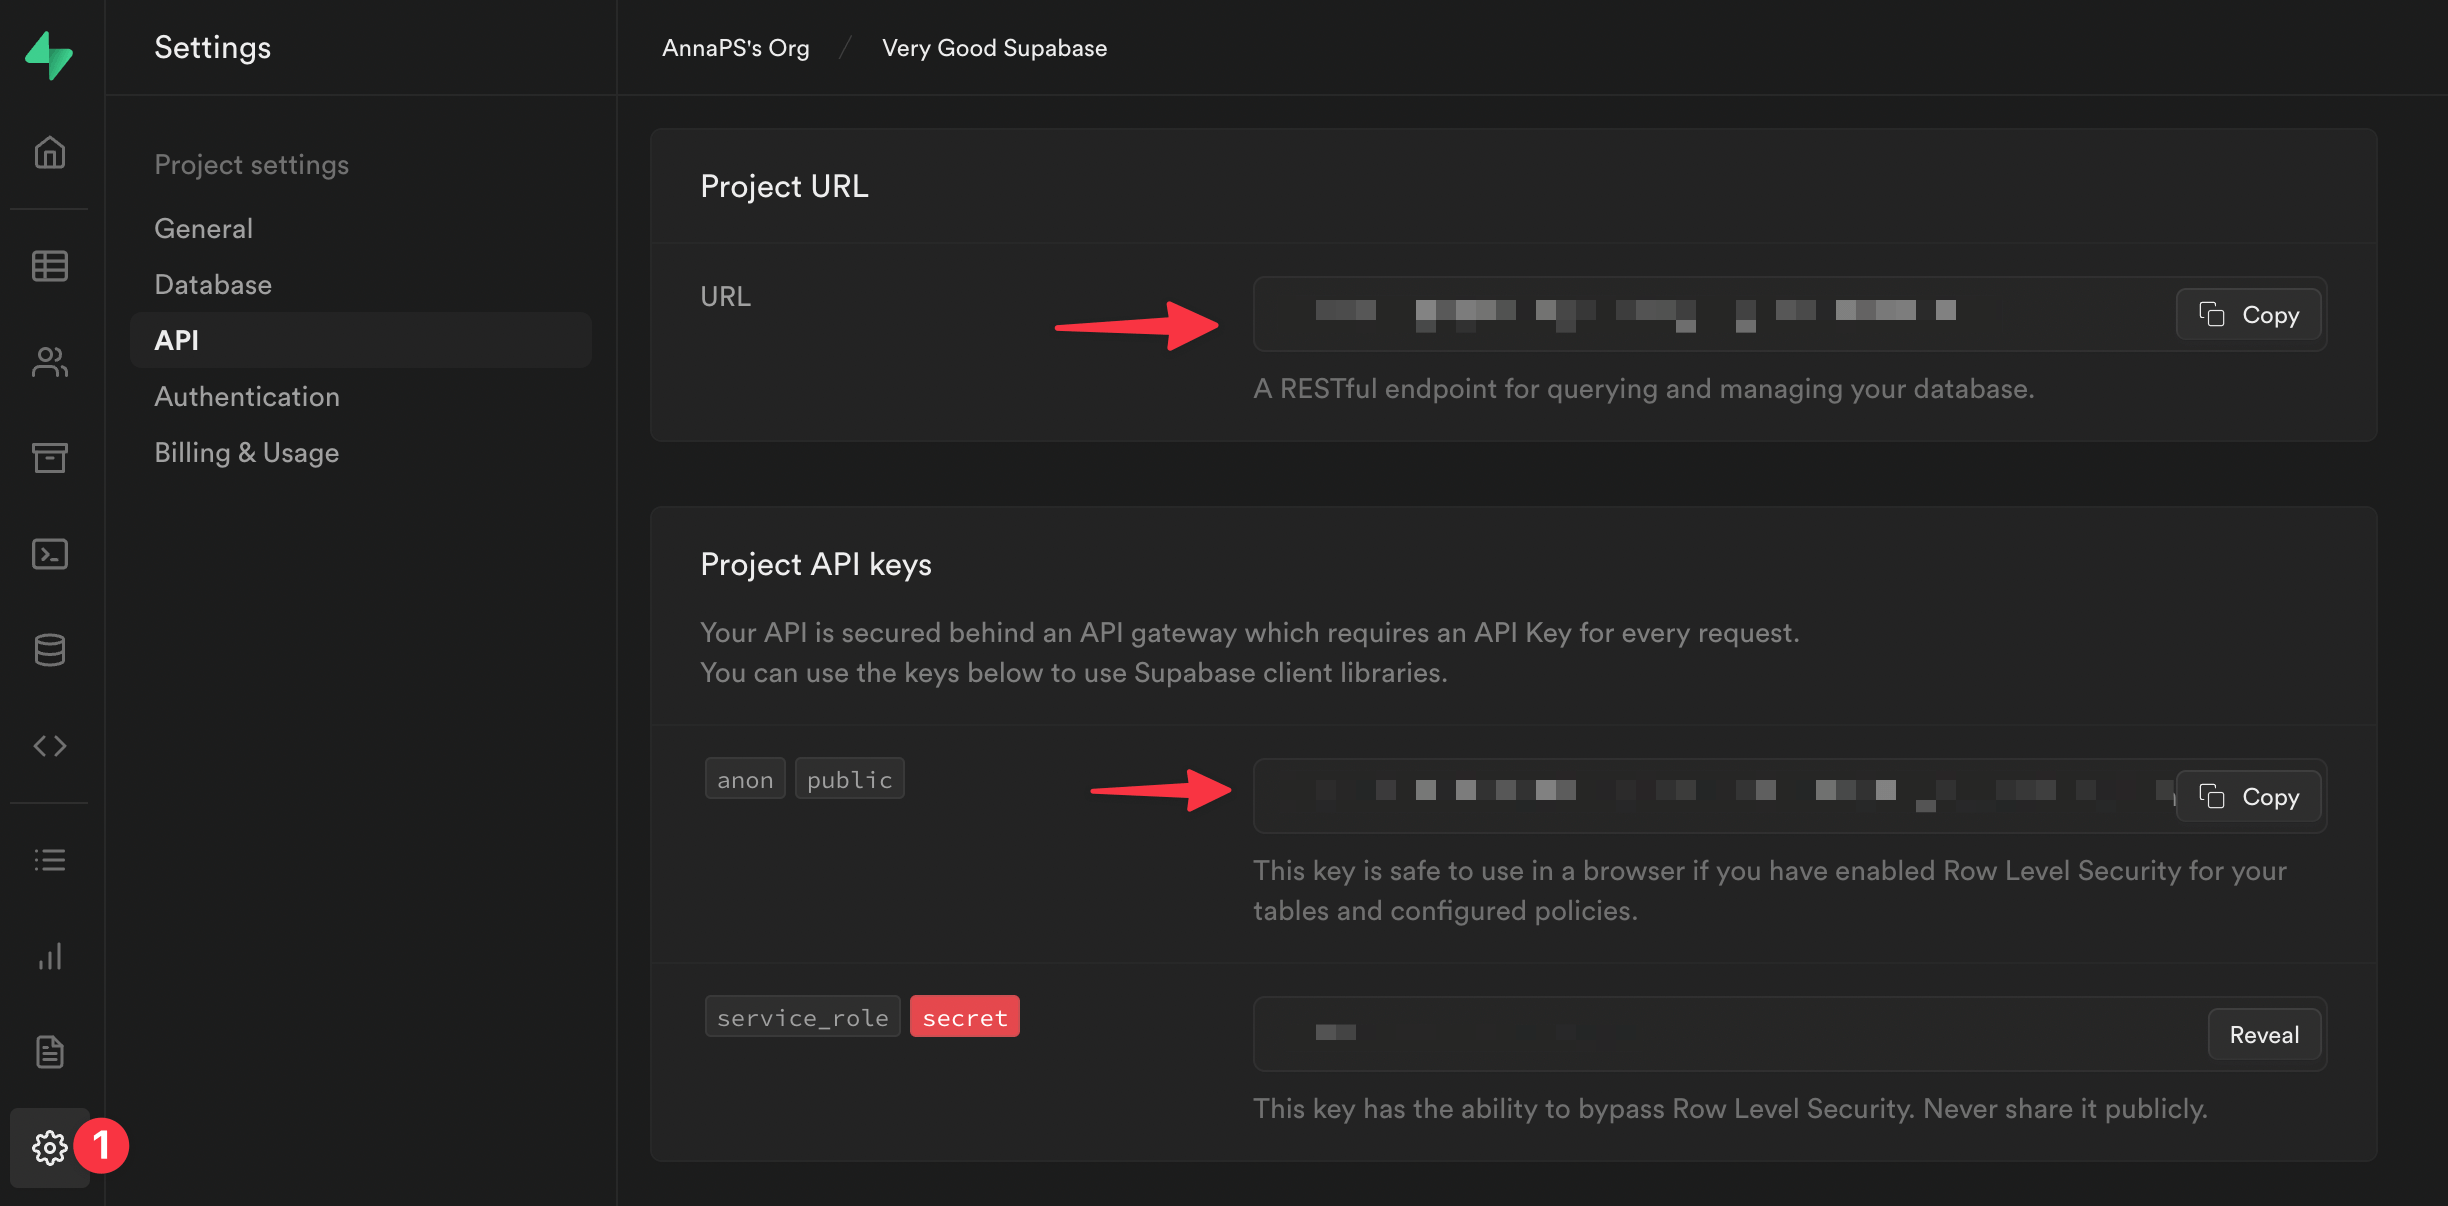
}As you might have noticed, to initialize Supabase, we need to provide the supabase url and the anon key, which can be found in the project settings.
Create the features
In this project, we are going to have four features:
- Auth States Supabase: here we are going to add two classes that will tell us if a user is authenticated or not and if the authentication is required. These classes are also going to be used in our widgets.
- App: this is going to be in charge of listening to the user status (authenticated or unauthenticated) to determine whether to navigate to the login page or account page.
- Login: this feature is going to host all of the sign-in logic for this project.
- Account: this feature is going to get the user information and display them into a text field. It will also update the information in the Supabase database and handle the sign-out.
Supabase states
- AuthStateSupabase
class AuthStateSupabase extends SupabaseAuthState {
  @override
  void onUnauthenticated() {
    if (mounted) {
      context.read().add(AppUnauthenticated());
    }
  }

  @override
  void onAuthenticated(Session session) {
    if (mounted) {
      context.read().add(const AppAuthenticated());
    }
  }

  @override
  void onPasswordRecovery(Session session) {}

  @override
  void onErrorAuthenticating(String message) {}
}- AuthStateSupabaseRequired
class AuthRequiredState<T extends StatefulWidget>
    extends SupabaseAuthRequiredState<T> {
  @override
  void onUnauthenticated() {
    if (mounted) {
      context.read<AppBloc>().add(AppUnauthenticated());
    }
  }
}
App
This feature is in charge of recovering the Supabase session to know if a user was authenticated in the previous session or not. With this information, this feature is going to determine where the application should navigate.
We are going to use Flow Builder to handle this navigation. Here we have the following structure:
├── lib
|   ├── app
│   │   ├── bloc
│   │   │   └── app_bloc.dart
|   |   |   └── app_event.dart
|   |   |   └── app_state.dart
│   │   └── view
│   │   |   ├── app.dart
│   │   |   └── app_view.dart
|   |   |   └── view.dart
|   |   └── routes
|   |   |   └── routes.dart
│ ├── app.dart- AppView: here we are extending the class with an AuthStateSupabase and not a StatefulWidget. This is important to know if the user is authenticated.
class AppView extends StatefulWidget {
  const AppView({super.key});

  @override
  State createState() => _AppViewState();
}

class _AppViewState extends AuthStateSupabase {
  @override
  void initState() {
    super.initState();
    recoverSupabaseSession(); // <--- Here we recover the supabase session
  }

  @override
  Widget build(BuildContext context) {
    return MaterialApp(
      title: 'Very Good Supabase',
      theme: ThemeData(
        appBarTheme: const AppBarTheme(color: Colors.teal),
        colorScheme: const ColorScheme.light().copyWith(
          primary: Colors.teal,
        ),
      ),
      localizationsDelegates: const [
        AppLocalizations.delegate,
        GlobalMaterialLocalizations.delegate,
      ],
      supportedLocales: AppLocalizations.supportedLocales,
      home: FlowBuilder(
        state: context.select((AppBloc bloc) => bloc.state.status),
        onGeneratePages: onGenerateAppViewPages,
      ),
    );
  }
}- AppBloc
class AppBloc extends Bloc {
  AppBloc() : super(const AppState()) {
    on(_onAppAuthenticated);
    on(_onLogoutRequest);
  }

  Future _onAppAuthenticated(
    AppAuthenticated event,
    Emitter emit,
  ) async {
    emit(state.copyWith(status: AppStatus.authenticated));
  }

  Future _onLogoutRequest(
    AppUnauthenticated event,
    Emitter emit,
  ) async {
    emit(state.copyWith(status: AppStatus.unauthenticated));
  }
}- Routes: this method onGenerateAppViewPages is used in our AppView.
List onGenerateAppViewPages(AppStatus state, List> pages) {
  switch (state) {
    case AppStatus.unauthenticated:
      return [LoginPage.page()];
    case AppStatus.authenticated:
      return [AccountPage.page()];
  }
}
Login
This feature is in charge of sign-in and checking the email text field using the form inputs package that we created.
The structure is:
├── lib
|   ├── login
│   │   ├── bloc
│   │   │   └── login_bloc.dart
|   |   |   └── login_event.dart
|   |   |   └── login_state.dart
│   │   └── view
│   │   |   ├── login_page.dart
│   │   |   └── login_view.dart
|   |   |   └── view.dart
│ ├── login.dart- LoginView: here we are going to have all the widgets needed to log in to our app. Also, we are going to use a AuthStateSupabase class to know if the user is currently logged in or not. In addition, we are going to use the input form package to check if the email is correct.
class LoginView extends StatefulWidget {
  const LoginView({super.key});

  @override
  State createState() => _LoginViewState();
}

class _LoginViewState extends AuthStateSupabase {
  @override
  Widget build(BuildContext context) {
    return ListView(
      padding: const EdgeInsets.symmetric(
        vertical: 50,
        horizontal: 32,
      ),
      children: [
        const _Header(),
        const SizedBox(height: 18),
        const _EmailInput(),
        const SizedBox(height: 28),
        const _SendEmailButton(),
        const SizedBox(height: 28),
        if (!kIsWeb) OpenEmailButton()
      ],
    );
  }
}

class _Header extends StatelessWidget {
  const _Header();

  @override
  Widget build(BuildContext context) {
    return Column(
      key: const Key('loginView_header'),
      crossAxisAlignment: CrossAxisAlignment.start,
      children: [
        Row(
          mainAxisAlignment: MainAxisAlignment.spaceAround,
          children: [
            SizedBox.square(
              dimension: 100,
              child: Assets.images.supabase.image(),
            ),
            SizedBox(
              width: 200,
              height: 100,
              child: Assets.images.vgv.image(),
            ),
          ],
        ),
        Padding(
          padding: const EdgeInsets.only(top: 100),
          child: Text(
            'Sign in via the magic link',
            style: Theme.of(context).textTheme.headline5,
          ),
        ),
      ],
    );
  }
}

class _EmailInput extends StatelessWidget {
  const _EmailInput();

  @override
  Widget build(BuildContext context) {
    final isInProgress = context.select(
      (LoginBloc bloc) => bloc.state.status == FormzSubmissionStatus.inProgress,
    );
    return TextFormField(
      key: const Key('loginView_emailInput_textField'),
      readOnly: isInProgress,
      onChanged: (email) {
        context.read().add(LoginEmailChanged(email));
      },
      decoration: const InputDecoration(labelText: 'Email'),
    );
  }
}

class _SendEmailButton extends StatelessWidget {
  const _SendEmailButton();

  @override
  Widget build(BuildContext context) {
    final state = context.watch().state;
    return ElevatedButton(
      key: const Key('loginView_sendEmail_button'),
      onPressed: state.status.isInProgress || !state.valid
          ? null
          : () => context.read().add(
                LoginSubmitted(
                  email: state.email.value,
                  isWeb: kIsWeb,
                ),
              ),
      child: Text(
        state.status.isInProgress ? 'Loading' : 'Send Magic Link',
      ),
    );
  }
}

class OpenEmailButton extends StatelessWidget {
  OpenEmailButton({
    EmailLauncher? emailLauncher,
    super.key,
  }) : _emailLauncher = emailLauncher ?? EmailLauncher();

  final EmailLauncher _emailLauncher;

  @override
  Widget build(BuildContext context) {
    final state = context.watch().state;
    return OutlinedButton(
      key: const Key('loginView_openEmail_button'),
      onPressed: state.status.isInProgress || !state.valid
          ? null
          : _emailLauncher.launchEmailApp,
      child: const Text('Open Email App'),
    );
  }
}- LoginBloc: the main aim of this class is communicating with the UserRepository to do login. Also, here we are going to handle all of the possible states of the email text field when the user changes the value.
class LoginBloc extends Bloc {
  LoginBloc(this._userRepository) : super(const LoginState()) {
    on(_onSignIn);
    on(_onEmailChanged);
  }

  final UserRepository _userRepository;

  void _onEmailChanged(LoginEmailChanged event, Emitter emit) {
    final email = Email.dirty(event.email);
    emit(
      state.copyWith(
        email: email,
        valid: Formz.validate([email]),
      ),
    );
  }

  Future _onSignIn(
    LoginSubmitted event,
    Emitter emit,
  ) async {
    try {
      emit(state.copyWith(status: FormzSubmissionStatus.inProgress));
      await _userRepository.signIn(
        email: event.email,
        isWeb: event.isWeb,
      );
      emit(state.copyWith(status: FormzSubmissionStatus.success));
    } catch (error) {
      emit(state.copyWith(status: FormzSubmissionStatus.failure));
      addError(error);
    }
  }
}
Account
This feature is in charge of multiple things:
- Retrieving information from the database.
- Updating user information in the database.
- Signing out.
- Checking the inputs of the userName and companyName text fields. The structure is:
├── lib
|   ├── account
│   │   ├── bloc
│   │   │   └── account_bloc.dart
|   |   |   └── account_event.dart
|   |   |   └── account_state.dart
│   │   └── view
│   │   |   ├── account_page.dart
│   │   |   └── account_view.dart
|   |   |   └── view.dart
│ ├── account.dart- AccountView: this class is going to extend to AuthRequiredState, which determines if the user is logged in. This is necessary because we are going to show the user account information.
class AccountView extends StatefulWidget {
  const AccountView({super.key});

  @override
  AccountViewState createState() => AccountViewState();
}

class AccountViewState extends AuthRequiredState {
  @override
  Widget build(BuildContext context) {
    return Scaffold(
      appBar: AppBar(title: const Text('Account')),
      body: BlocConsumer(
        listener: (context, state) {
          if (state.status.isUpdate) {
            context.showSnackBar(message: 'Updated!');
          }
        },
        buildWhen: (previous, current) =>
            current.status.isSuccess ||
            current.status.isUpdate ||
            current.status.isEditing,
        builder: (context, state) {
          return ListView(
            padding: const EdgeInsets.all(28),
            children: const [
              _Header(),
              _UserNameTextField(),
              _UserCompanyNameTextField(),
              SizedBox(height: 50),
              _UpdateUserButton(),
              SizedBox(height: 18),
              _SignOutButton(),
            ],
          );
        },
      ),
    );
  }
}

class _Header extends StatelessWidget {
  const _Header();

  @override
  Widget build(BuildContext context) {
    return Column(
      key: const Key('account_header'),
      crossAxisAlignment: CrossAxisAlignment.start,
      children: [
        Row(
          mainAxisAlignment: MainAxisAlignment.spaceAround,
          children: [
            SizedBox.square(
              dimension: 100,
              child: Assets.images.supabase.image(),
            ),
            SizedBox(
              width: 200,
              height: 100,
              child: Assets.images.vgv.image(),
            ),
          ],
        ),
        Padding(
          padding: const EdgeInsets.only(top: 100),
          child: Text(
            'Update your information',
            style: Theme.of(context).textTheme.headline5,
          ),
        ),
      ],
    );
  }
}

class _UserNameTextFieldState extends State<_UserNameTextField> {
  final _controller = TextEditingController();

  @override
  Widget build(BuildContext context) {
    return BlocConsumer(
      listener: (context, state) {
        if (state.status.isSuccess) {
          _controller.text = state.userName.value;
        }
      },
      builder: (context, state) {
        return Padding(
          padding: const EdgeInsets.only(top: 18),
          child: TextFormField(
            controller: _controller,
            key: const Key('accountView_userName_textField'),
            readOnly: state.status.isLoading,
            textInputAction: TextInputAction.next,
            onChanged: (userName) => context
                .read()
                .add(AccountUserNameChanged(userName)),
            decoration: const InputDecoration(labelText: 'User Name'),
          ),
        );
      },
    );
  }

  @override
  void dispose() {
    _controller.dispose();
    super.dispose();
  }
}

class _UserCompanyNameTextField extends StatefulWidget {
  const _UserCompanyNameTextField();

  @override
  State<_UserCompanyNameTextField> createState() =>
      _UserCompanyNameTextFieldState();
}

class _UserCompanyNameTextFieldState extends State<_UserCompanyNameTextField> {
  final _controller = TextEditingController();

  @override
  Widget build(BuildContext context) {
    return BlocConsumer(
      listener: (context, state) {
        if (state.status.isSuccess) {
          _controller.text = state.companyName.value;
        }
      },
      builder: (context, state) {
        return Padding(
          padding: const EdgeInsets.only(top: 18),
          child: TextFormField(
            controller: _controller,
            key: const Key('accountView_companyName_textField'),
            readOnly: state.status.isLoading,
            onChanged: (companyName) => context.read().add(
                  AccountCompanyNameChanged(companyName),
                ),
            decoration: const InputDecoration(
              labelText: 'Company Name',
            ),
          ),
        );
      },
    );
  }

  @override
  void dispose() {
    _controller.dispose();
    super.dispose();
  }
}

class _UpdateUserButton extends StatelessWidget {
  const _UpdateUserButton();

  @override
  Widget build(BuildContext context) {
    final state = context.watch().state;
    return ElevatedButton(
      key: const Key('accountView_update_button'),
      onPressed: state.status.isLoading || !state.valid
          ? null
          : () => context.read().add(
                AccountUserUpdated(
                  user: User(
                    id: state.user.id,
                    userName: state.userName.value,
                    companyName: state.companyName.value,
                  ),
                ),
              ),
      child: Text(state.status.isLoading ? 'Saving...' : 'Update'),
    );
  }
}

class _SignOutButton extends StatelessWidget {
  const _SignOutButton();

  @override
  Widget build(BuildContext context) {
    final isLoading = context.select(
      (AccountBloc bloc) => bloc.state.status == AccountStatus.loading,
    );
    return OutlinedButton(
      key: const Key('accountView_signOut_button'),
      onPressed: isLoading
          ? null
          : () => context.read().add(AccountSignedOut()),
      child: const Text('Sign Out'),
    );
  }
}- AccountBloc: this class is in charge of multiple events. Here we need to use UserRepository to retrieve the user information, update the database, and sign out. Also, we have other events to handle user interaction with the userName and companyName text fields.
class AccountBloc extends Bloc {
  AccountBloc(this._userRepository) : super(const AccountState()) {
    on(_onGetUserInformation);
    on(_onUpdateUser);
    on(_onSignOut);
    on(_onUserNameChanged);
    on(_onCompanyNameChanged);
  }

  final UserRepository _userRepository;

  Future _onGetUserInformation(
    AccountUserInformationFetched event,
    Emitter emit,
  ) async {
    try {
      emit(state.copyWith(status: AccountStatus.loading));
      final user = await _userRepository.getUser();
      emit(
        state.copyWith(
          status: AccountStatus.success,
          user: user,
          userName: UserName.dirty(user.userName),
          companyName: CompanyName.dirty(user.companyName),
        ),
      );
    } catch (error) {
      emit(state.copyWith(status: AccountStatus.error));
      addError(error);
    }
  }

  Future _onUpdateUser(
    AccountUserUpdated event,
    Emitter emit,
  ) async {
    try {
      emit(state.copyWith(status: AccountStatus.loading));
      await _userRepository.updateUser(user: event.user);
      emit(state.copyWith(status: AccountStatus.update, valid: false));
    } catch (error) {
      emit(state.copyWith(status: AccountStatus.error));
      addError(error);
    }
  }

  Future _onSignOut(
    AccountSignedOut event,
    Emitter emit,
  ) async {
    try {
      emit(state.copyWith(status: AccountStatus.loading));
      await _userRepository.signOut();
      emit(state.copyWith(status: AccountStatus.success));
    } catch (error) {
      emit(state.copyWith(status: AccountStatus.error));
      addError(error);
    }
  }

  Future _onUserNameChanged(
    AccountUserNameChanged event,
    Emitter emit,
  ) async {
    final userName = UserName.dirty(event.userName);
    emit(
      state.copyWith(
        status: AccountStatus.edit,
        userName: userName,
        valid: Formz.validate([userName, state.companyName]),
      ),
    );
  }

  Future _onCompanyNameChanged(
    AccountCompanyNameChanged event,
    Emitter emit,
  ) async {
    final companyName = CompanyName.dirty(event.companyName);
    emit(
      state.copyWith(
        status: AccountStatus.edit,
        companyName: companyName,
        valid: Formz.validate([companyName, state.userName]),
      ),
    );
  }
}
Demo
It’s time to see everything working together! Fingers crossed 🤞
It’s working! 🎉
Extra: Personalize your email body content
You can personalize the body of the email that you send after sign-in. It is quite easy to do with Supabase. Go to the project settings in your Supabase console and follow the steps.

Summary
Supabase is a great tool if you are looking for login options beyond the typical ones like email/password, Twitter, Facebook, Google, and Apple. You can see here all the auth providers that Supabase can provide.
Also, if you prefer to manage your data in a SQL database, it is a great choice because Supabase uses a PostgreSQL database, in contrast with Firebase. You can find more info in the official documentation.
I highly recommend you check all the options that Supabase provides because there are tons of them with extensive documentation. Here are a few reference links:
Hope you enjoyed it! If you are interested in testing this application, you can find all the tests working in the GitHub repository.
Thanks for your time! 😃 Happy coding!
Felix Angelov and Óscar Martín contributed to this article.