On this page
- Background
- What we will do
- Assumptions & Pre-requisites
- Step 1: Create a Firebase Project
- Step 2. Setup the Firebase CLI
- Step 3. Setup your Firebase Project Folder
- Step 4. Create Your ExpressJS App as a Cloud Function
- Step 5. Setup Hosting Rewrites for our Cloud Function
- Step 6. Deploy!
- Done: You now have a highly scalable API
- BONUS: Setup Custom Domain
- That’s it!
Background
At Very Good Ventures, we create mobile apps for a variety of brands and companies. Behind every good app is a scalable backend API.
Recently, we’ve become heavy users of Serverless / Cloud Function architectures, specifically the tools provided by Firebase and Google Cloud Functions. We love it for how easy they are o deploy, manage, and scale. So, we want to show you how to quickly set it up.
What we will do
We are going to set up a Node.js API server using Express using cloud functions. When we’re done, you’ll know firsthand how fast, easy, and inexpensive it is to create an API that will autoscale using Firebase.
Assumptions & Pre-requisites
To hit our 10 minute goal, we have to make a few assumptions and you have to be prepared with a few things.
- You need a computer with Terminal or other command line tool
- You will need a text editor (e.g., Atom, VS Code)
- You need Node.js installed. You can do that here or try on a Mac: brew install node
- You need a Firebase account
- As a bonus at the end, we’ll hook up a custom domain. For that, you will need a domain name that you can change the DNS settings for. Try something like dnsimple, or Google Domains
Step 1: Create a Firebase Project
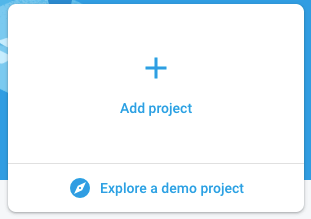
The first thing we need is a Firebase project. Go to the Firebase website (you should be logged in). Create a new project by clicking the “Add Project” button.

Step 2. Setup the Firebase CLI
- Open Terminal. (Note: We’ll say ‘Terminal’, but we mean the command line, so use whatever you have for that)
- Install the Firebase CLI Tools by executing npm install -g firebase-tools (if this doesn’t work you don’t have Node properly installed)
- Next, login to the CLI by executing firebase login
- You should be prompted to authenticate with Google (make sure you login with the account that created your Firebase project!)
- Execute firebase projects:list (or firebase list in older CLI versions) and you should see the project you just created in the list. If not, you’re logged in with the wrong user.
Step 3. Setup your Firebase Project Folder
- In Terminal, navigate to a project folder you want to use for this (e.g, ~/Developer/api-on-firebase)
- Execute firebase init

- Select “Functions” and “Hosting”. Note that you can use Database, Firestore, or Storage in your project as well. They’re all great tools, and you should check them out. But for this, we’ll just focus on Functions and Hosting.

- Select the project you created in Step 1 from the list
- Select TypeScript. Ok, you could pick JavaScript, but we’d really recommend Typescript. :-)
- Now just hit ‘Enter’ until the wizard is done (or you can type “Y”, which is the default if you just hit Enter).
Step 4. Create Your ExpressJS App as a Cloud Function
The firebase init command does many things and we encourage you to read up on them. But for now, what we care about is the /functions folder.
- Navigate to /functions
- Open the folder in your editor of choice (e.g., Atom or VS Code)
- Now open /src/index.ts
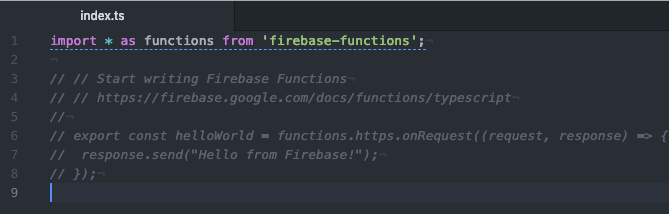
This is the main file that declares your Cloud Functions. In practice, you may have many individual functions declared in this file. For now, we’ll do just one… our Express app.
Setup your Express API
- Back in Terminal, make sure you’re in the /functions folder
- Execute npm i express —save
- Go back to /src/index.ts in your editor
- Delete all the commented out lines, then add the following under the import * as functions from ‘firebase-functions’ line.
import * as express from "express";

const app = express();

app.get("/", (_req: express.Request, res: express.Response, _next: any) => {
	res.status(200).send("This is Very Good!");
});

export const ExpressApi = functions.https.onRequest(app);
You did it!
You just created a Firebase Function, called ExpressApi. It is an HTTPS triggered function that will respond to web requests. Obviously it does basically nothing at this point, but from here you can do anything you’d normally do with an Express API.
Step 5. Setup Hosting Rewrites for our Cloud Function
This step is optional. But it only takes a moment, and it will enable us to add a custom domain for our API. If you don’t want to set up a custom domain, skip to Step 6.
Firebase allows us to host static files and websites under its Hosting feature. This is really great, and is perfect for static websites as well as React and Angular apps. But, we can also use it to get a custom domain for our Cloud Function by using rewrites.
- Delete the file public/index/html. The reason is that the files in the public directory will take precedence over any rewrites. So just get rid of this default index page, or our root function request will not work.
- In your editor, open firebase.json in the root folder of the project, add the following to the object inside the hosting object, and save.
"rewrites": [{
  "source": "**",
  "function": "ExpressApi"
}]
Your firebase.json should look something like this:
{
  "functions": {
    "predeploy": [
      "npm --prefix \"$RESOURCE_DIR\" run lint",
      "npm --prefix \"$RESOURCE_DIR\" run build"
    ],
    "source": "functions"
  },
  "hosting": {
    "public": "public",
    "ignore": [
      "firebase.json",
      "**/.*",
      "**/node_modules/**"
    ],
    "rewrites": [{
      "source": "**",
      "function": "ExpressApi"
    }]
  }
}
What does this do?
This is going to point any requests to our Firebase Hosting to our cloud ExpressApi cloud function. This is the magic that will give us the custom domain.
Step 6. Deploy!
Now, we’ll get our code and hosting rewrites deployed to Firebase. This is super simple. Just do…
- Go to your /functions folder
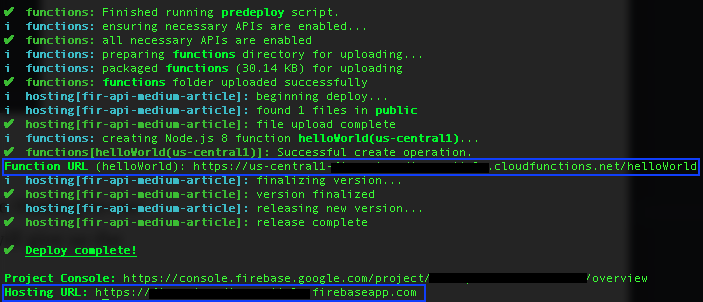
- Execute firebase deploy —only functions,hosting
When it’s done your function will be deployed at the Function URL provided. Also notice the Hosting URL which is the URL Firebase gives us for our hosting.
See if it worked
- Open your Function URL in your browser. It should say “This is Very Good!”
- Now, try theHosting URL. It should also say “This is Very Good!”
Done: You now have a highly scalable API
Wasn’t that fast? Wasn’t that easy? You don’t have to set up any servers. No apt-get! No SSH keys! No autoscaling logic! No load balancers!
It’s also really really cheap! You only get charged when your cloud function is invoked…so that means that if nobody is hitting your API overnight, you won’t be paying for a running server instance that isn’t being used.
Lastly, it’ll scale massively and automatically. Firebase Functions will just do it automatically for you based on the traffic you receive and at an incredibly low cost.
Pretty slick!
So, at this point you could call it quits. You can just use your Function URL or Hosting URL as your the URL for your API. That’s it! But we like to be fancy, so let’s get a custom domain for our API.
BONUS: Setup Custom Domain
We will assume you already own the domain you want to use and that you have access to its DNS settings.
Setup Firebase Hosting
- In the Firebase console, click into your project, and then select the “Hosting Tab”.
- Tap the “Connect Domain” button
- Enter the domain you want to use in the input box and hit continue

- You will need to verify ownership of your domain. Follow the instructions. Note that it might take a while for Firebase to pick them up.
- Lastly, add the A records Firebase gives you to your DNS
That’s it!
Once your DNS records propagate, your domain will now point to your Express API running on Firebase Functions!